All products featured are independently chosen by us. However, SoundGuys may receive a commission on orders placed through its retail links. See our ethics statement.
How to download Spotify songs to MP3
Published onApril 7, 2025
Spotify is one of the world’s most popular music streaming platforms, but sometimes, you might want to download your favorite tracks in MP3 format for offline listening. While Spotify’s Premium subscription allows for offline listening within the app, it doesn’t provide actual MP3 files that you can use anywhere. This guide will show you a reliable method to download Spotify songs as MP3 files. If you want to know how to use Spotify offline you can check this guide instead.
QUICK ANSWER
The safest and most reliable way to download Spotify songs as MP3 files is to use Audacity (a free, open-source audio recording software) to record the songs as they play on your device. This method avoids potentially sketchy online converters and ensures you get good-quality audio files. Keep in mind, that the recording will only be as good as the track being played, recording in a specific format or bitrate won't change how the recording sounds. Just remember to respect copyright laws and only use downloaded music for personal purposes.
How to download Spotify songs to MP3 using Audacity
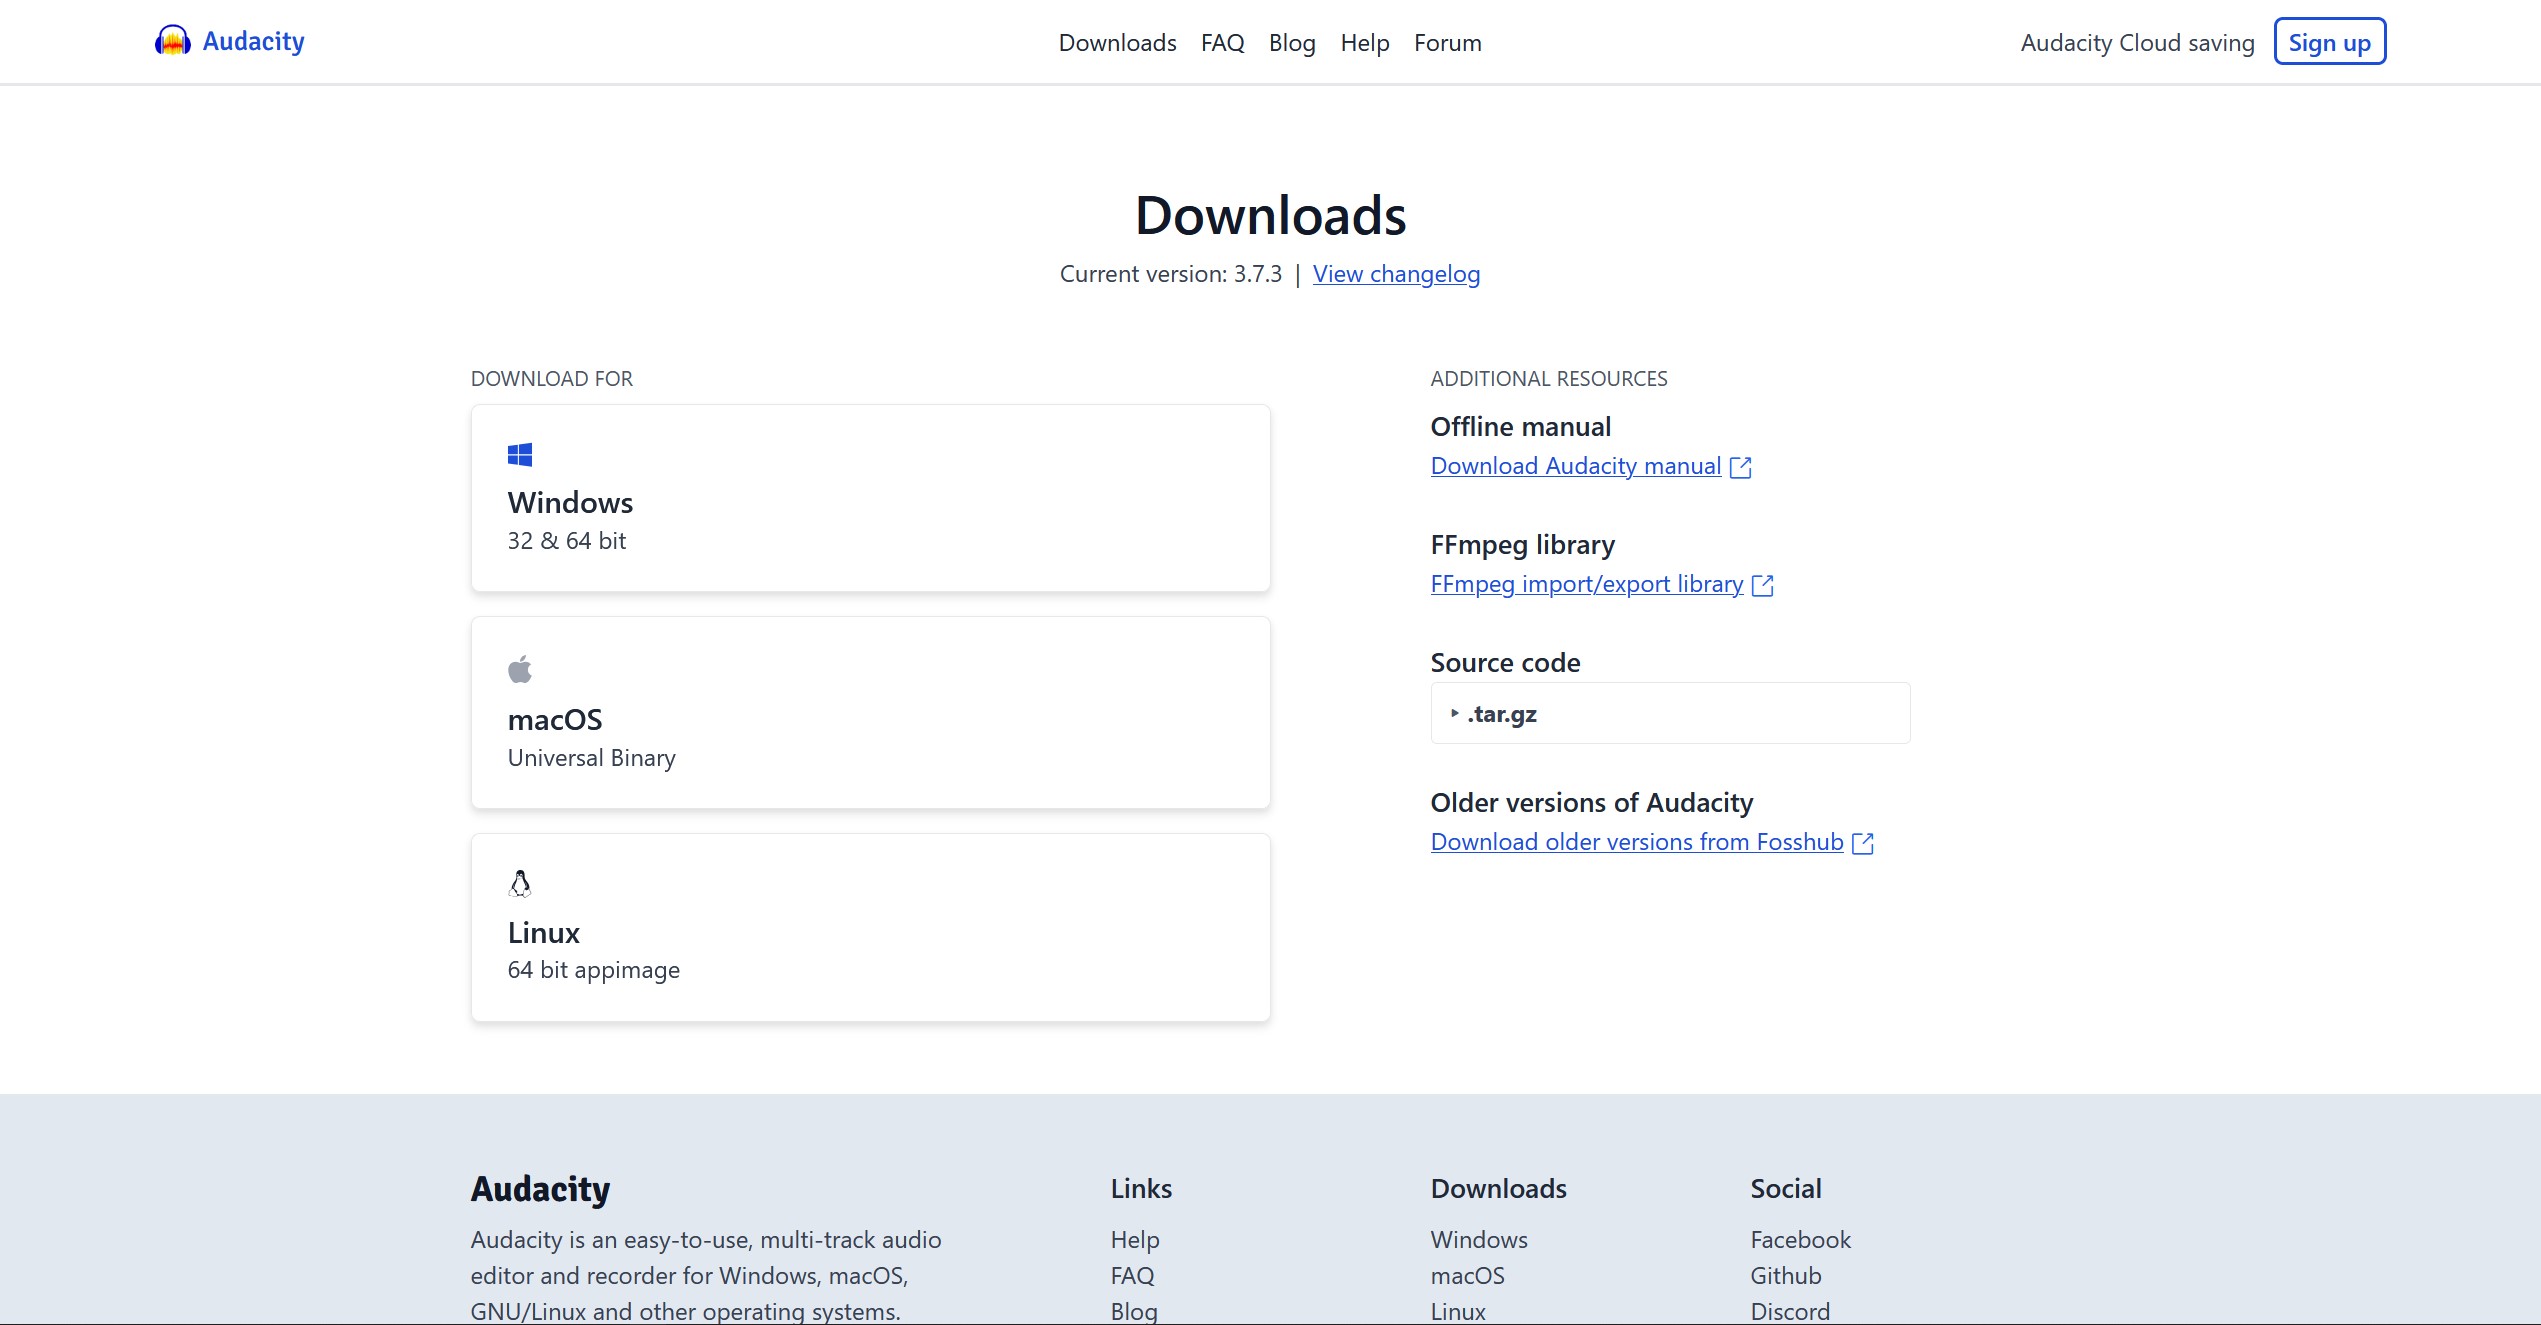
First, you’ll need to download and install Audacity on your computer. Visit the website to select the version for your operating system (Windows, Mac, or Linux).
Once Audacity is installed, you’ll need to configure it to record system audio.
To do so:
- Launch Audacity from your applications folder or start menu.
- Open the “Audio Setup” drop down menu, select “Host” and select the following based on your operating system:
- Windows: Choose “Windows WASAPI”
- Mac: Choose “Core Audio”
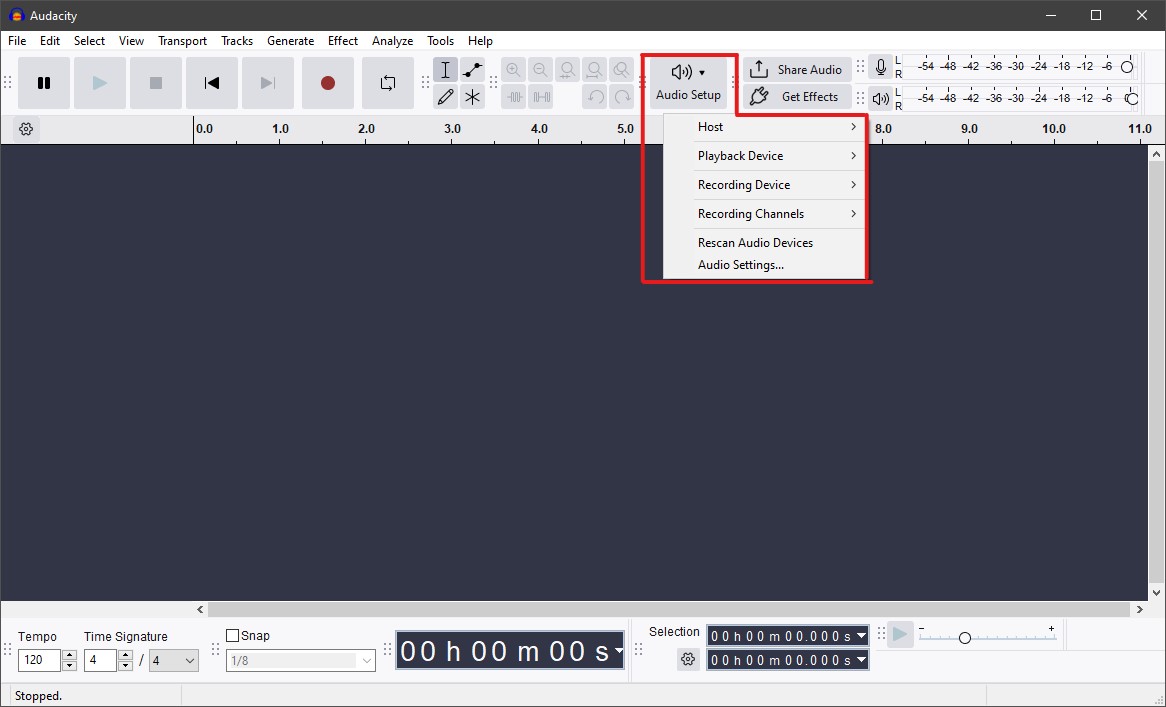
- To record your desktop Audio, select your output device by going back into the “Audio Setup” drop down menu and opening the “Recording Device” options.
- Select your output device used to listen to your desktop audio, your output device should have”(loopback)” at the end of its name.
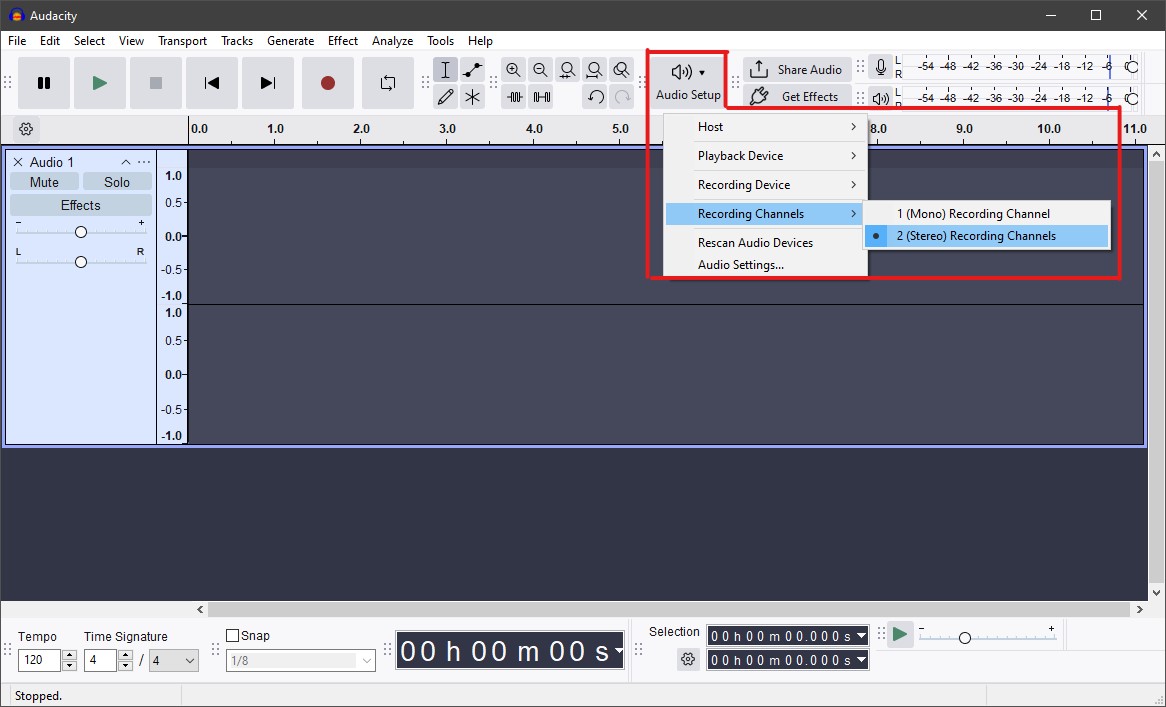
- Make sure the recording channels are set to stereo. Back in the “Audio Setup” menu, select the “Recording Channels” menu.
- Select “2 (Stereo) Recording Channels” option in order to record in stereo to be able to hear both left and right sides of the audio.
Now you’ll need to get your Spotify track ready for recording.
- Open Spotify on the same device and find the exact song you want to download.
- Queue up the song but don’t play it yet.
- Adjust your system volume to a moderate level to avoid distortion.
Step 4: Record the Spotify Song
Time to capture the audio!
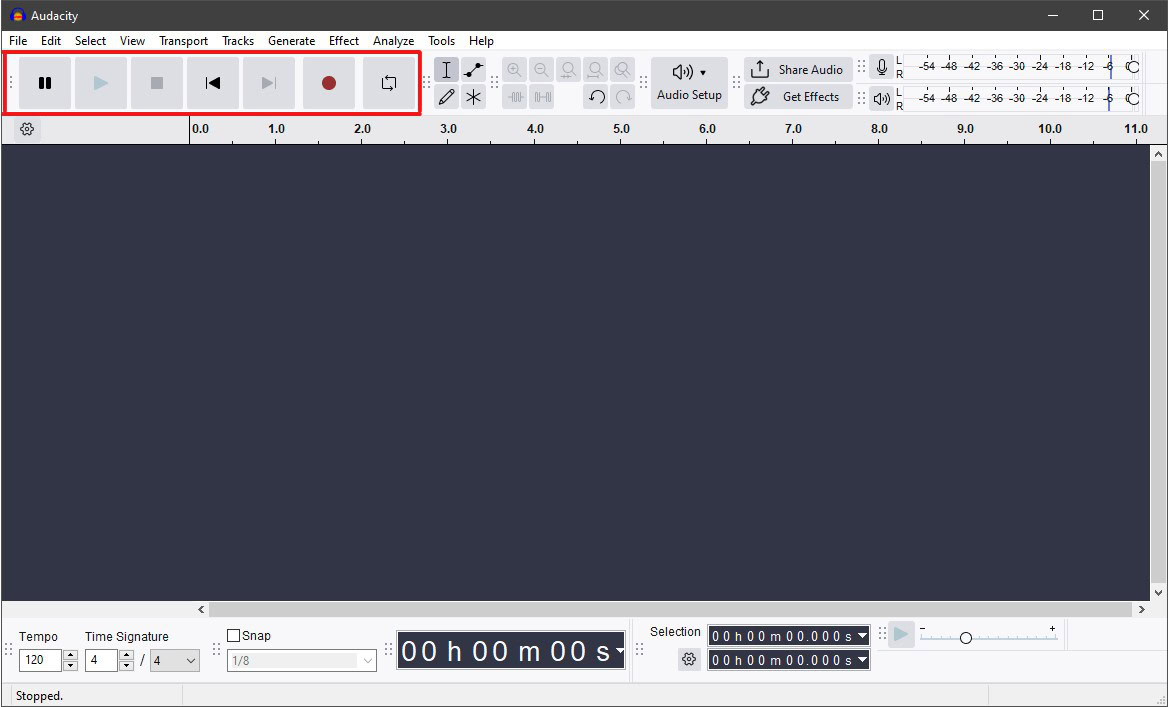
- In Audacity, click the start recording button (red circle icon).
- Quickly switch to Spotify and press Play on your song.
- Let the song play completely through. You will have to wait until the end of the song.
- When the song finishes, switch back to Audacity and press the Stop button (square icon) to end the recording.
Step 5: Edit Your Recording (Optional)
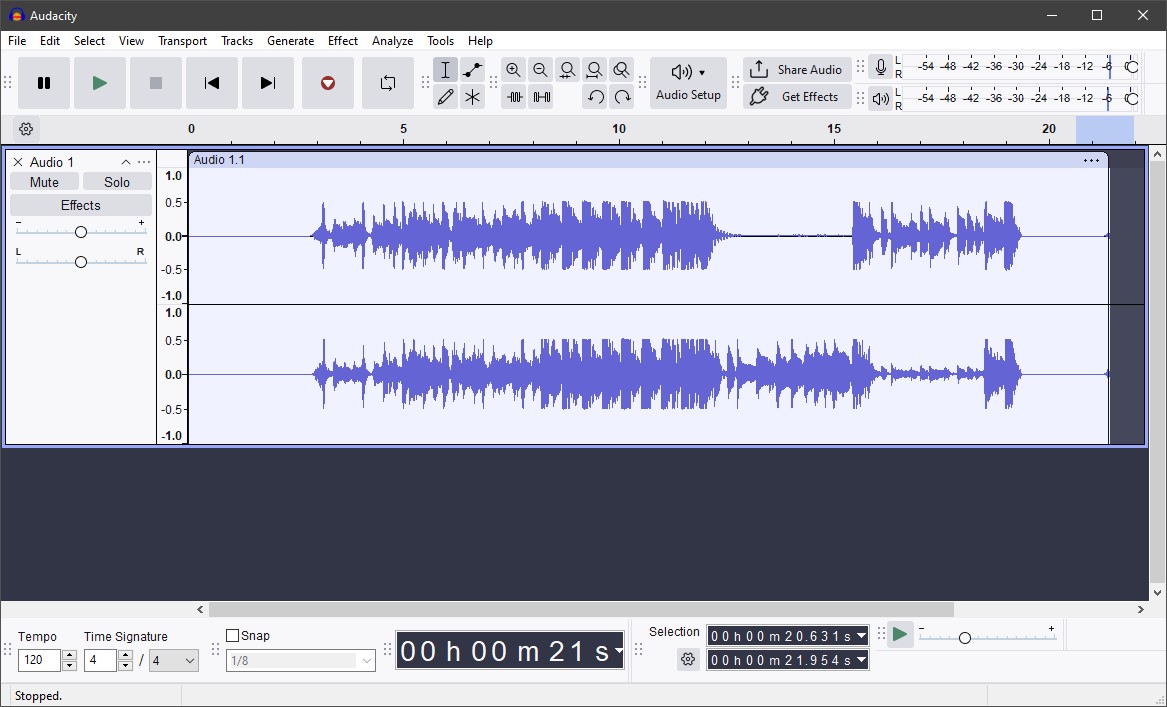
Clean up your recording for the best quality.
- To remove silence at the beginning:
- Click and drag to select the silent portion.
- Press Delete on your keyboard.
- To remove silence at the end:
- Repeat the same process for any trailing silence.
Step 6: Export as MP3
to Save your recording as an MP3 file.
- Open the “File” tab and select “Export Audio”. You can also use the shortcut key “Control+Shift+E”.
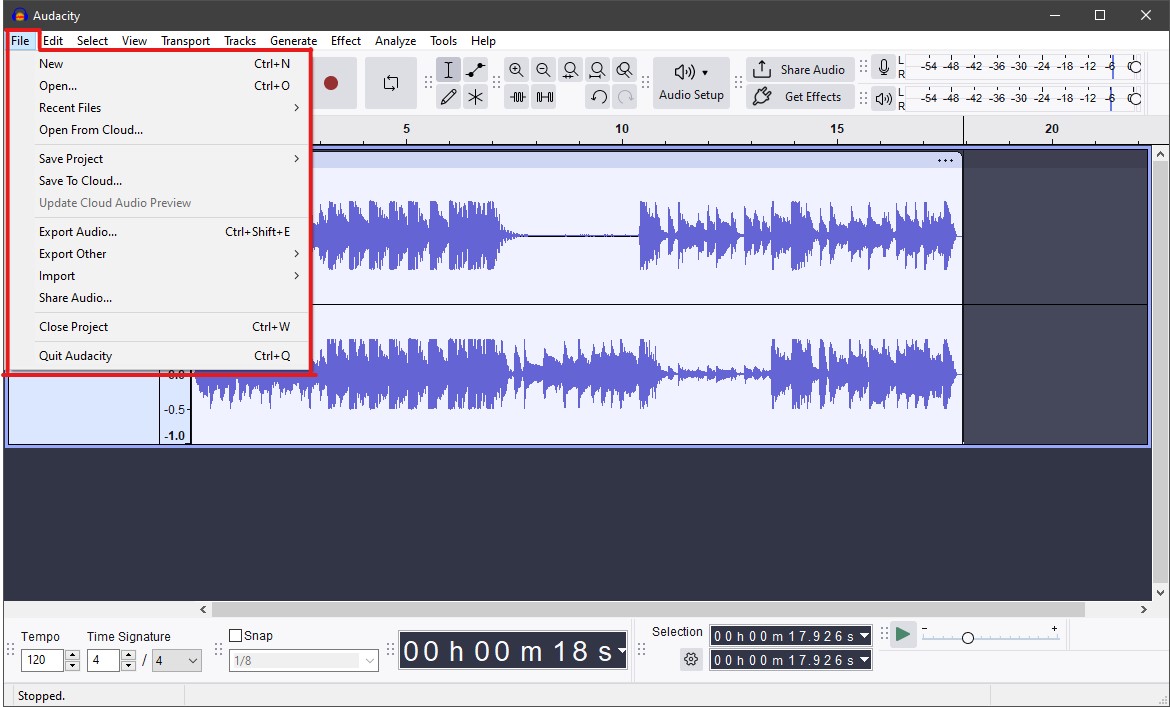
- Select Export to computer into a new window.
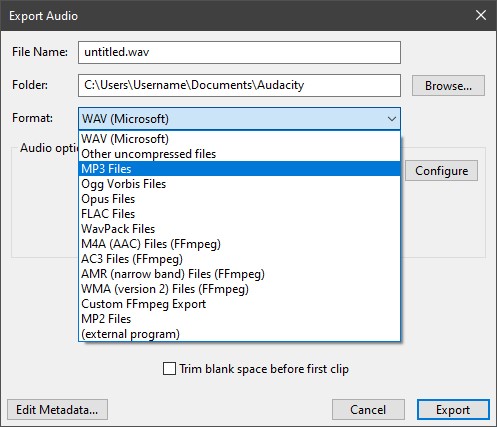
- Name the file in “File Name”.
- In the “Format” options, select “MP3 Files”.
-
- You can change the location of the saved MP3 by selecting the “Browse” button at the end of the “Folder” options.
- If you’d like to have metadata such as artist name, title, and album. Select the “edit Metadata” options and fill in as desired.
- Select “Export” to create the MP3 file.
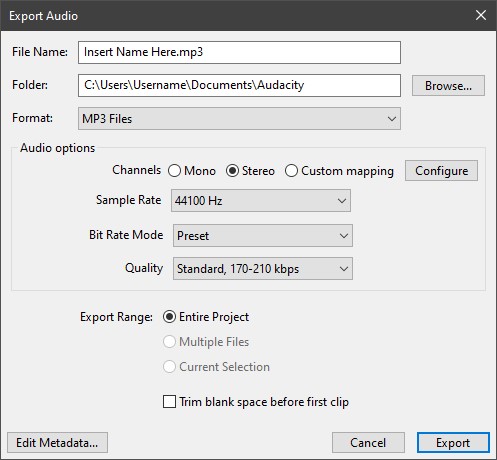
- Your MP3 file is now ready to use anywhere, anytime, for your personal use, without having to use internet access!
How to download Spotify songs to MP4 using OBS
Step 1: Download and Install OBS
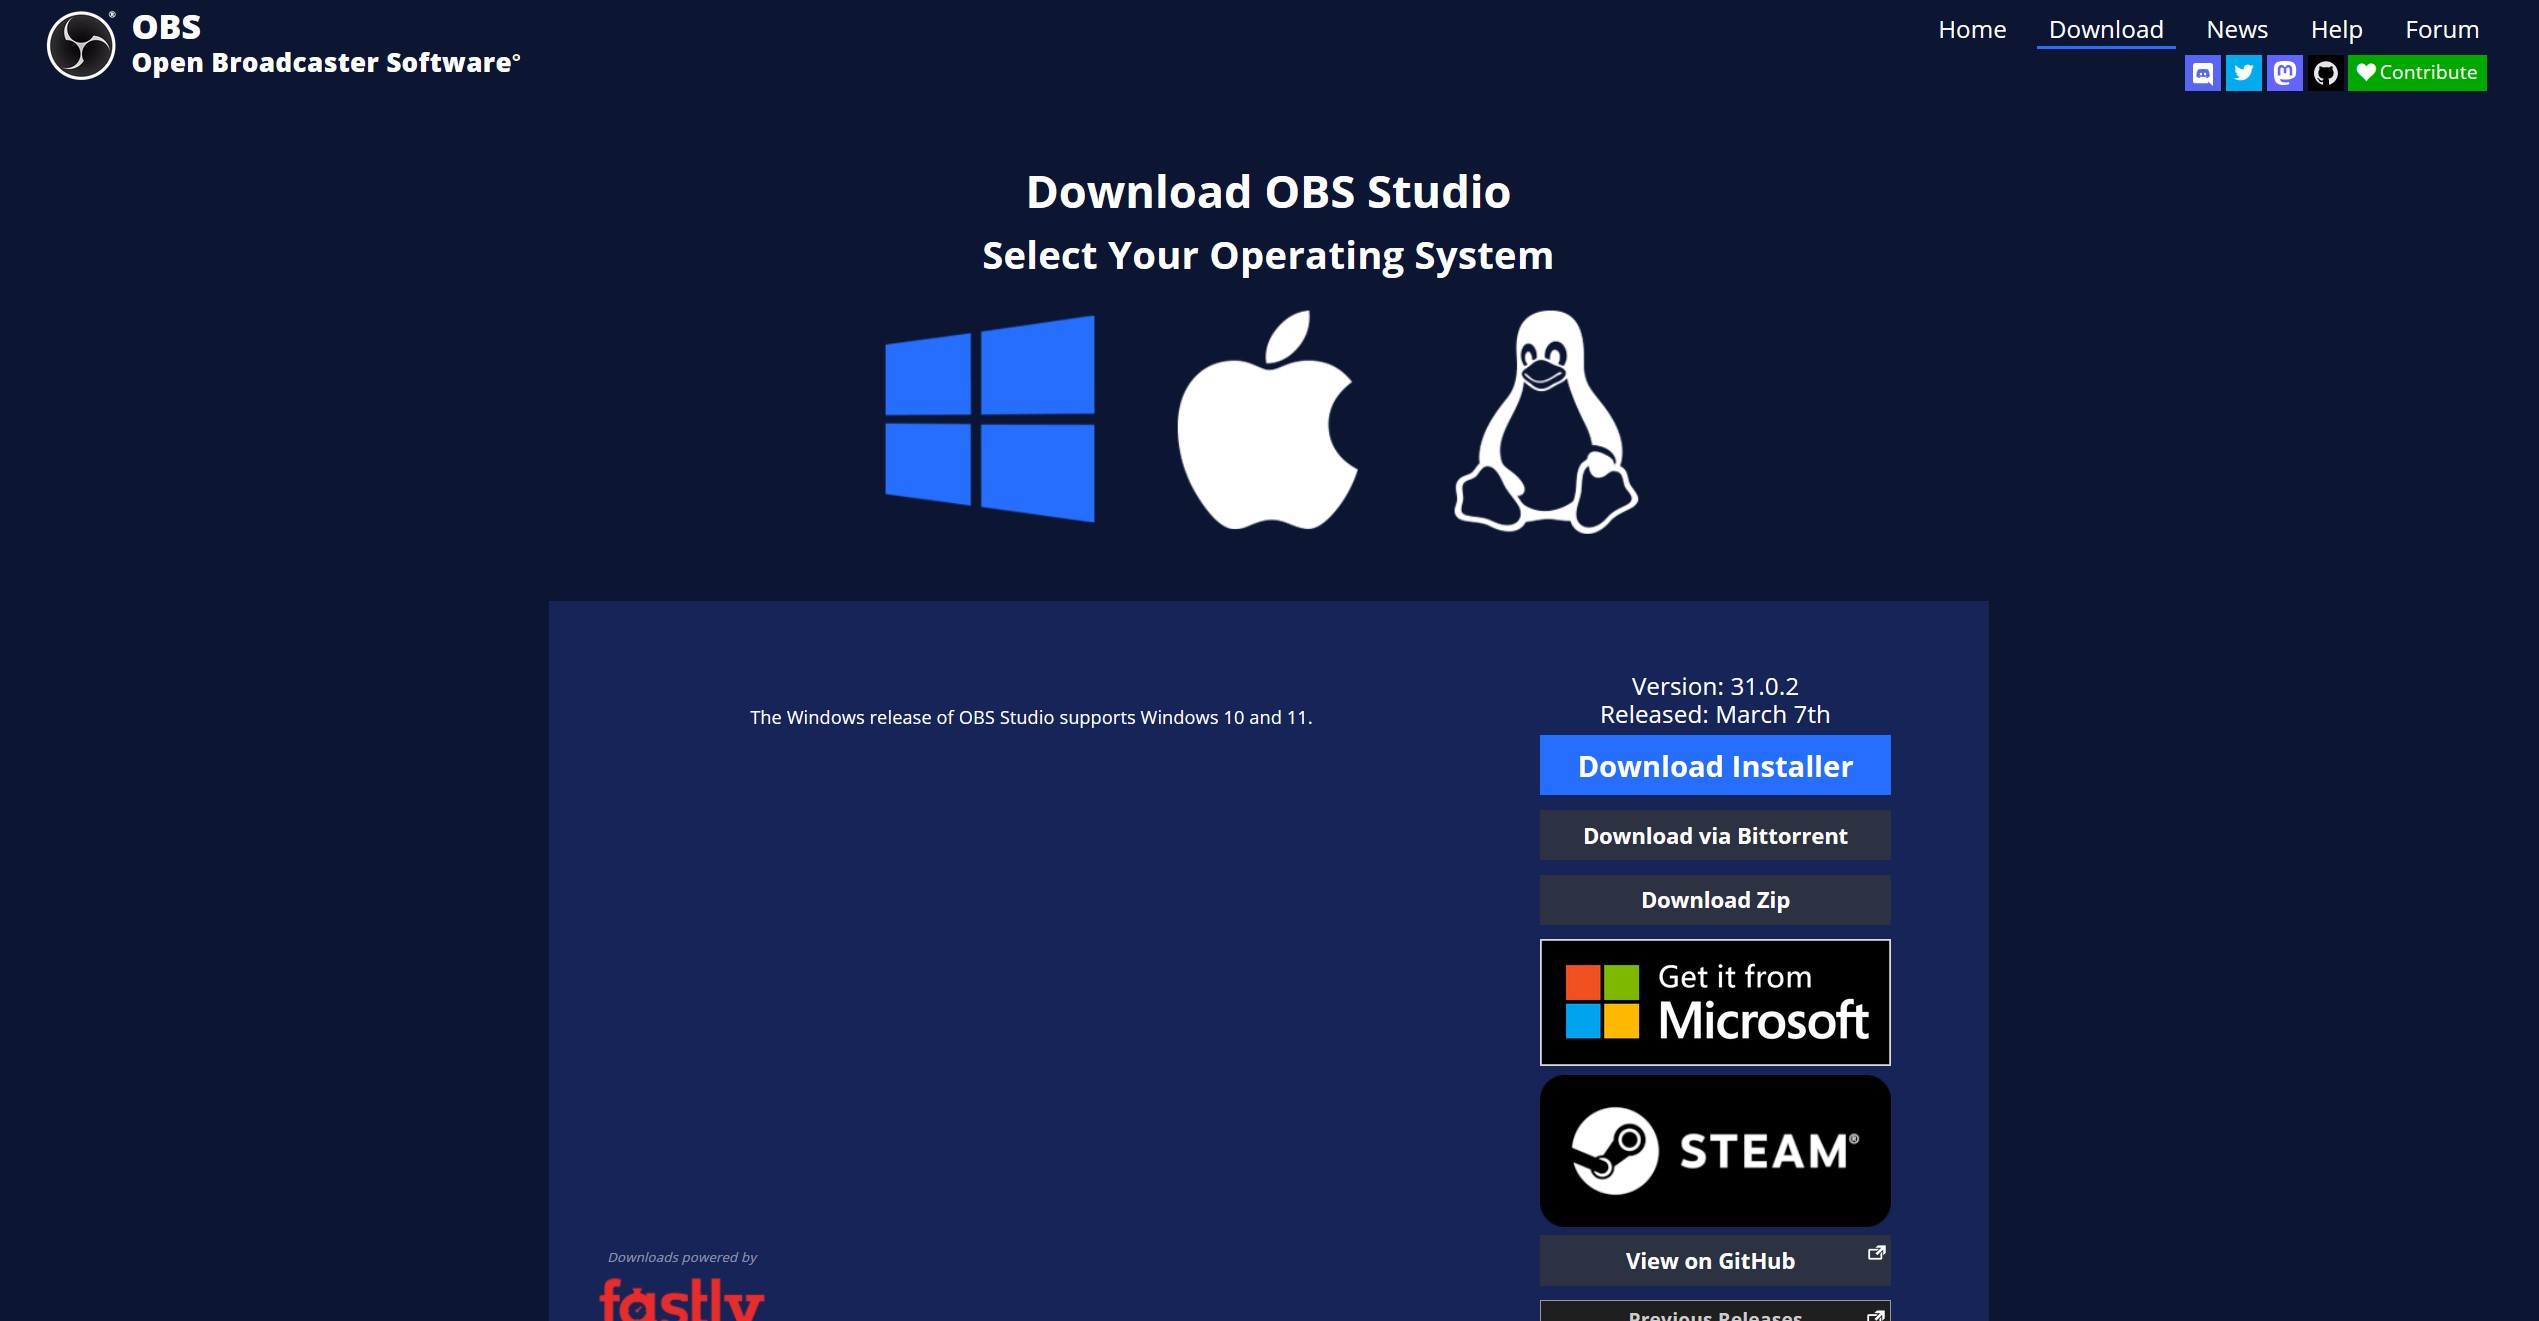
You’ll need to download and install OBS on your computer. Visit the website to select the version for your operating system (Windows, Mac, or Linux).
Step 2: Configure OBS recording settings
Once OBS is installed, you’ll need to configure it to record system audio. To do so:
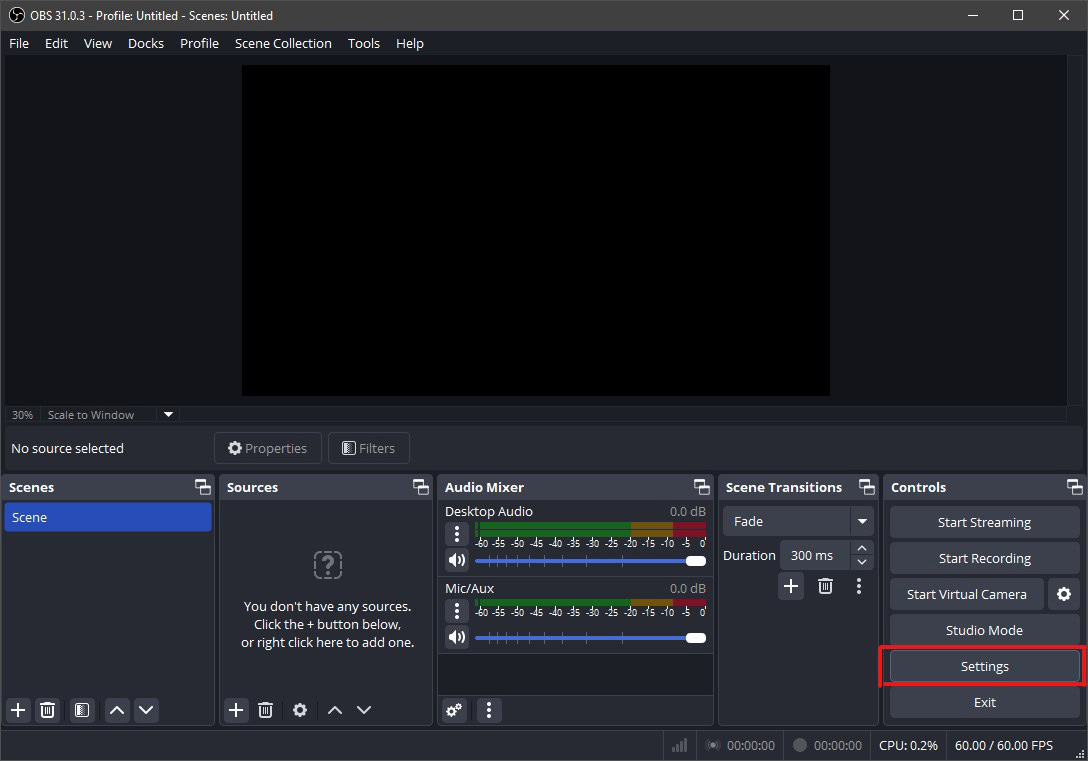
- Launch OBS from your applications folder or start menu.
- Select the “Settings” option on the bottom right-hand section of the application.
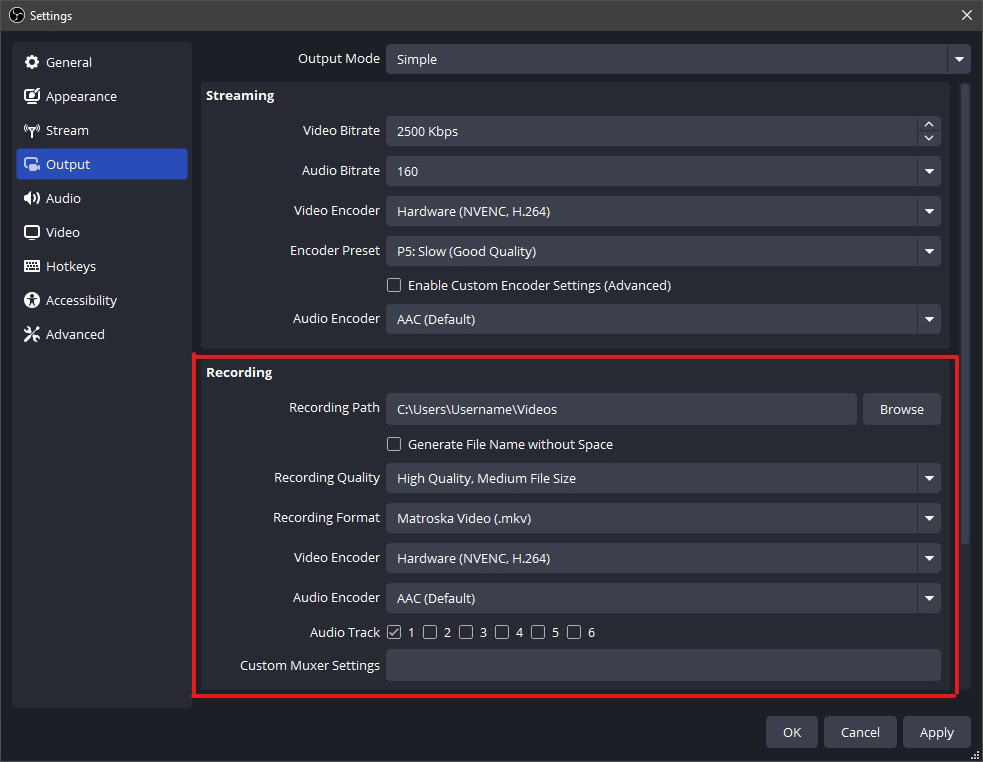
- Select the “Output” tab on the left-hand side of the settings menu.
- Scroll down to “Recording” and change the “Recording Format” into MPEG-4 (.mp4).
Now you’ll need to get your Spotify track ready for recording.
- Open Spotify on the same device and find the exact song you want to download.
- Queue up the song, but don’t play it yet.
- Adjust your system volume to a moderate level to avoid distortion.
Step 2: Add Spotify into recording source in OBS
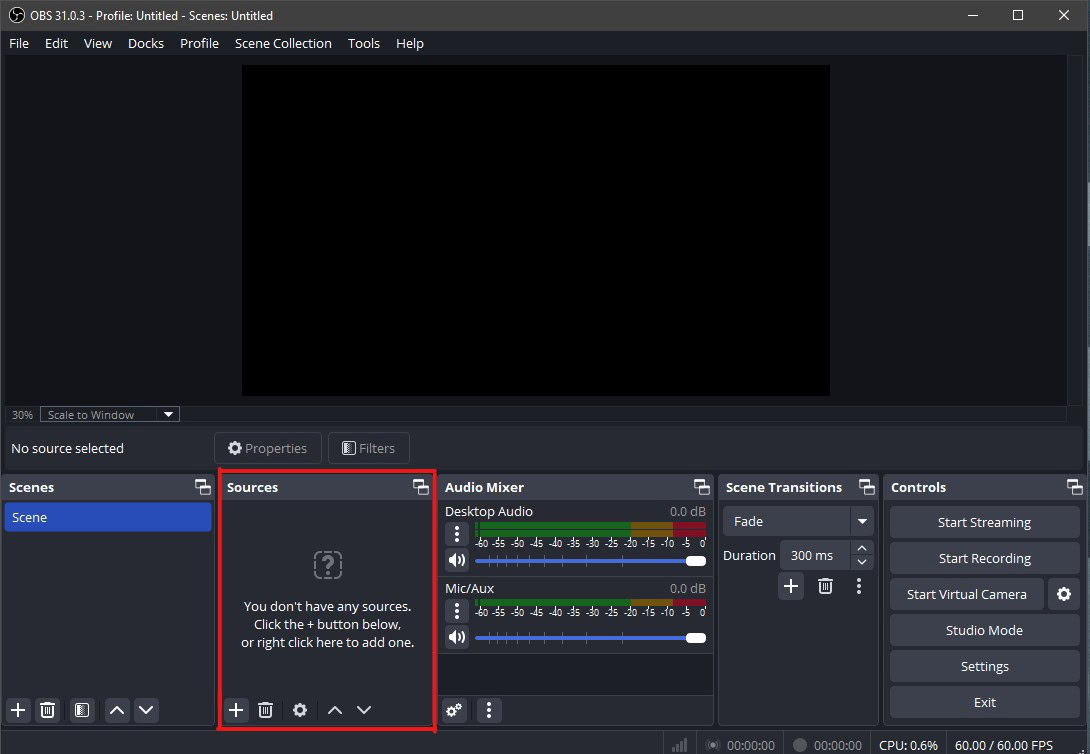
With Spotify open you’ll have to add Spotify as an audio source in OBS. Here’s how to add it as a source:
- Select the “plus” icon in the bottom right of the “Sources” section in the bottom of OBS.
- Select “Audio Capture”.
- Under Create new, rename your source to “Spotify” and select OK.
- For “method” select “Application Audio Capture”.
- Select “Spotify” for the “Application”.
- Select “OK”.
Step 3: Record the Spotify Song
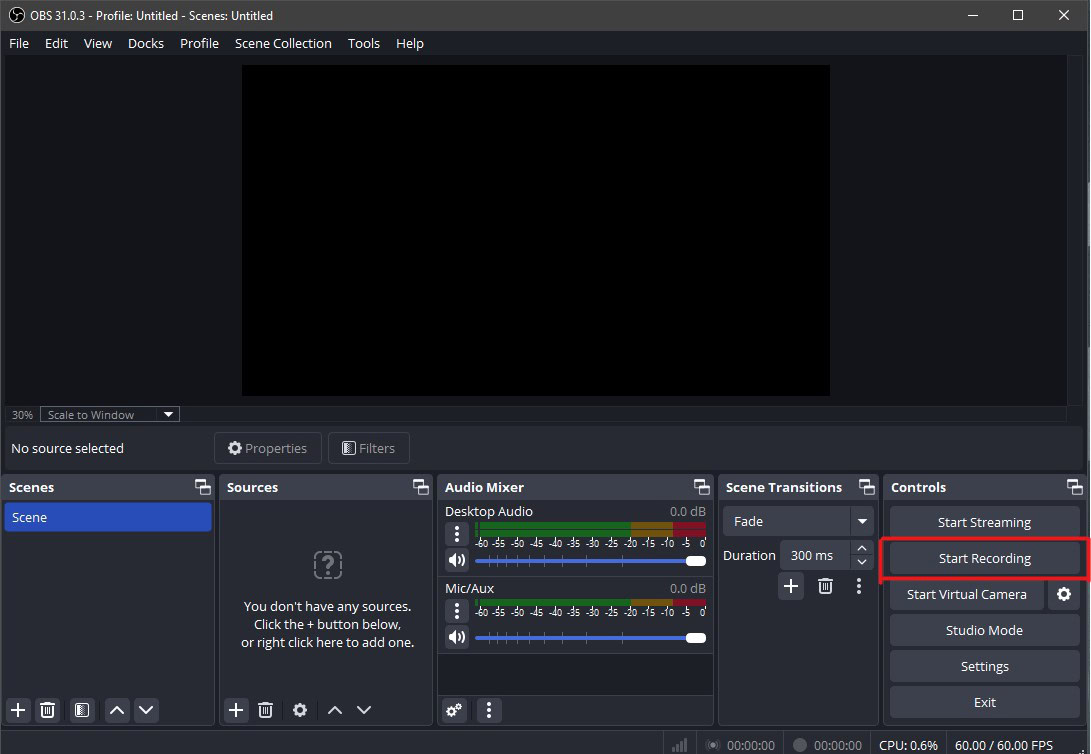
Time to capture the audio!
- In OBS, select the “Start Recording” button.
- Quickly switch to Spotify and Play the track.
- Let the song play completely through.
- When the song finishes, switch back to OBS and press the “Stop Recording” button.
How to find the location of the recording
Now that you’re done recording, where did the recording go? Here’s how to find your recording folder for OBS:
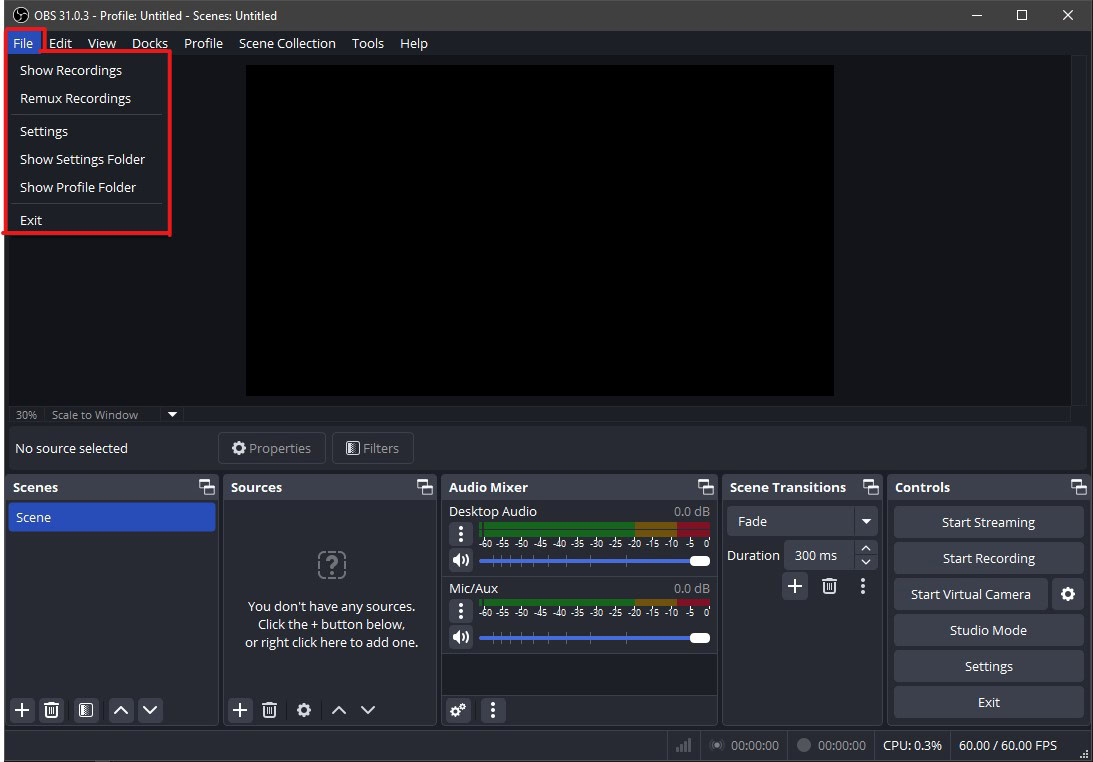
- Select the “File” Tab.
- Select “Show Recordings”.
Important tips for best results
- Ensure that no notifications or alerts will sound during recording
- Close unnecessary applications to prevent computer slowdowns
- Test a short recording first to check your audio levels
- Consider creating a playlist and recording multiple songs in one session
- Remember that this method records in real-time, so a 3-minute song takes 3 minutes to record
A note about online converters
While websites like SpotifyMate and SpotifyDownloader exist, these services often:
- Provide lower quality audio, or the wrong audio track entirely
- Potentially contains malware
- May violate Spotify’s terms of service
The Audacity method described here gives you better quality and is much safer than online alternatives.