All products featured are independently chosen by us. However, SoundGuys may receive a commission on orders placed through its retail links. See our ethics statement.
How to fix problems with the Sony WF-1000XM3
February 22, 2023
The Sony WF-1000XM3 has made its claim to fame as one of the most popular pairs of true wireless earbuds by featuring very good active noise canceling (ANC), a pleasing sound signature, and extensive app functionality. As capable as it is, the WF-1000XM3 is still an imperfect piece of tech, meaning it has its quirks.
Are you hearing occasional audio dropouts? Having trouble keeping the buds in your ear? Don’t remember what firmware your earbuds are running? This guide answers virtually any question you may have about the Sony WF-1000XM3, and if you’re using the newer Sony WF-1000XM4, many of these tips still apply.
Editor’s note: this article was updated on February 22, 2023, to explain how to initialize the Sony WF-1000XM3 and to add a frequency response chart.
How to find the model and serial number of your Sony WF-1000XM3
Finding the model number of your product is easy: it’s at the top of this article. If you missed that, you can find it in the app, printed near the inner hinge of the charging case, and printed on the back of each earbud. No matter what color your earbuds are, no matter where or when you bought them, the model number is still “WF-1000XM3.”
Finding the serial number is not as straightforward as finding the model number; though, it’s still a painless process. The serial number for the Sony WF-1000XM3 has seven digits and can be found on either the packaging of your product, or inside of the charging case towards the right of the hinge. It would be a good idea to write your serial number down somewhere in case you need it for warranty purposes.
How to pair your Sony WF-1000XM3 with any device
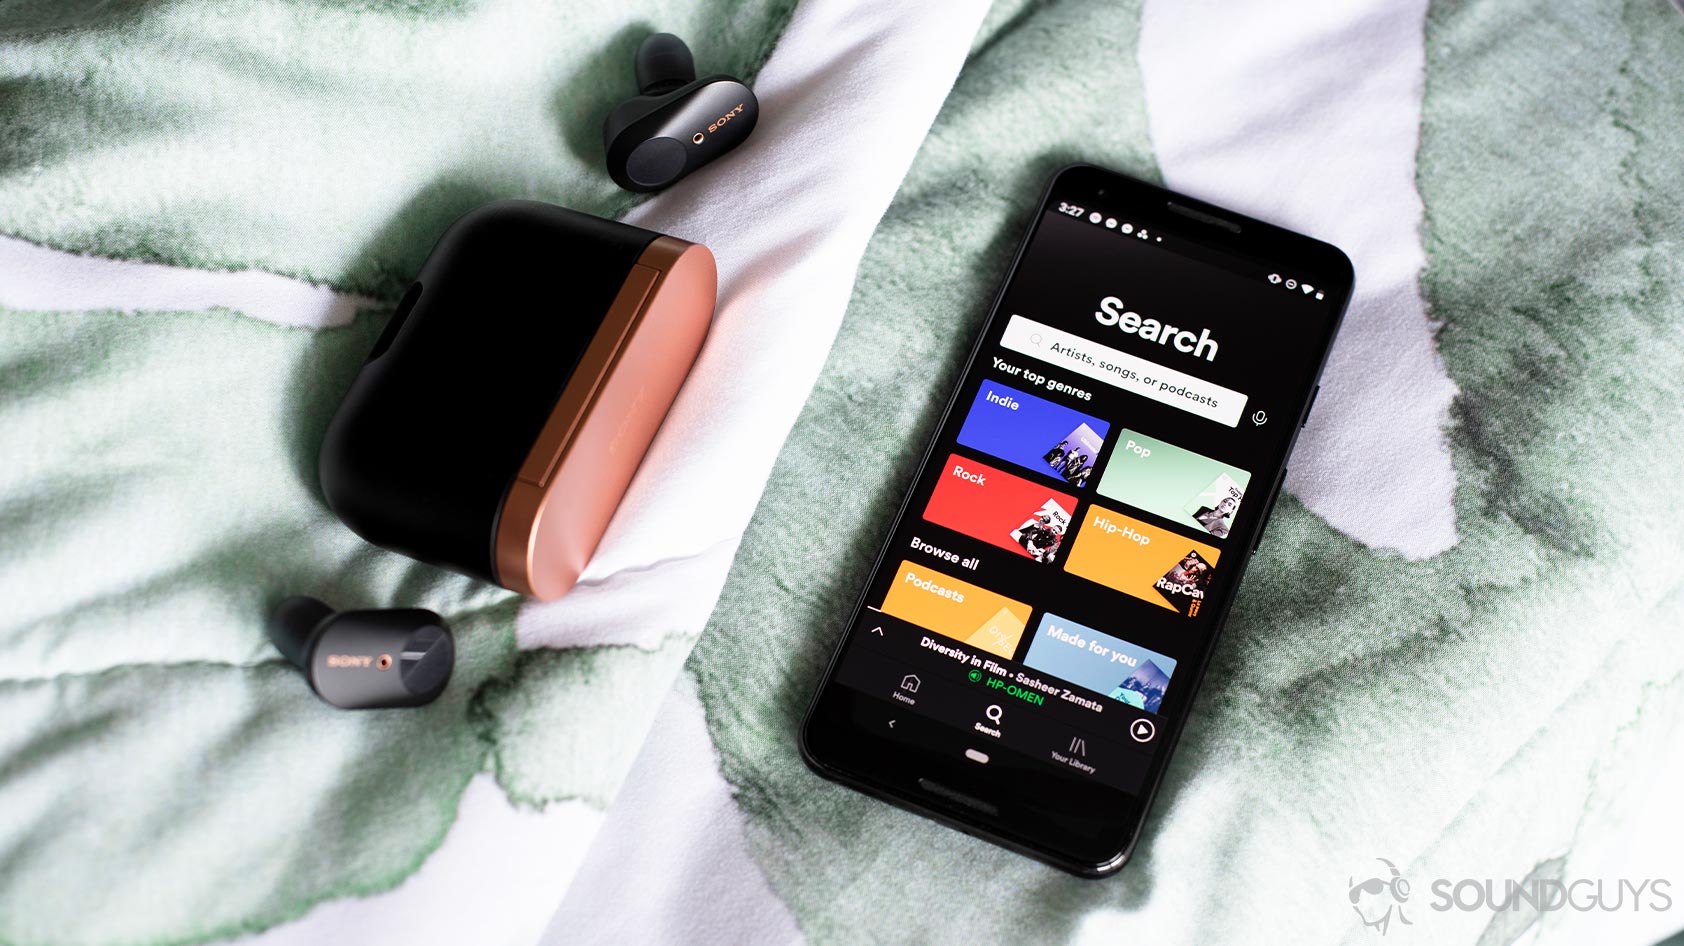
To pair your wireless Sony earbuds with your Bluetooth device, follow these steps:
- Remove the earbuds from the charging case and place them in your ears.
- Press and hold the touch sensor of each earbud for eight seconds.
- Your earbuds are ready to pair when you hear a voice say, “Bluetooth pairing,” and its LED lights flash blue.
- Go into your device’s Bluetooth settings, and select “WF-1000XM3” from the list of available devices.
Unfortunately, the Sony WF-1000XM3 doesn’t support Bluetooth multipoint connectivity, which means you cannot connect the earbuds to two device at once. Instead, you must have previously established connections with the desired devices at an earlier date. Then, you must manually disconnect the Sony WF-1000XM3 from the current source and manually connect it to the desired source via the Bluetooth menu.
How to find your firmware version for your Sony WF-1000XM3
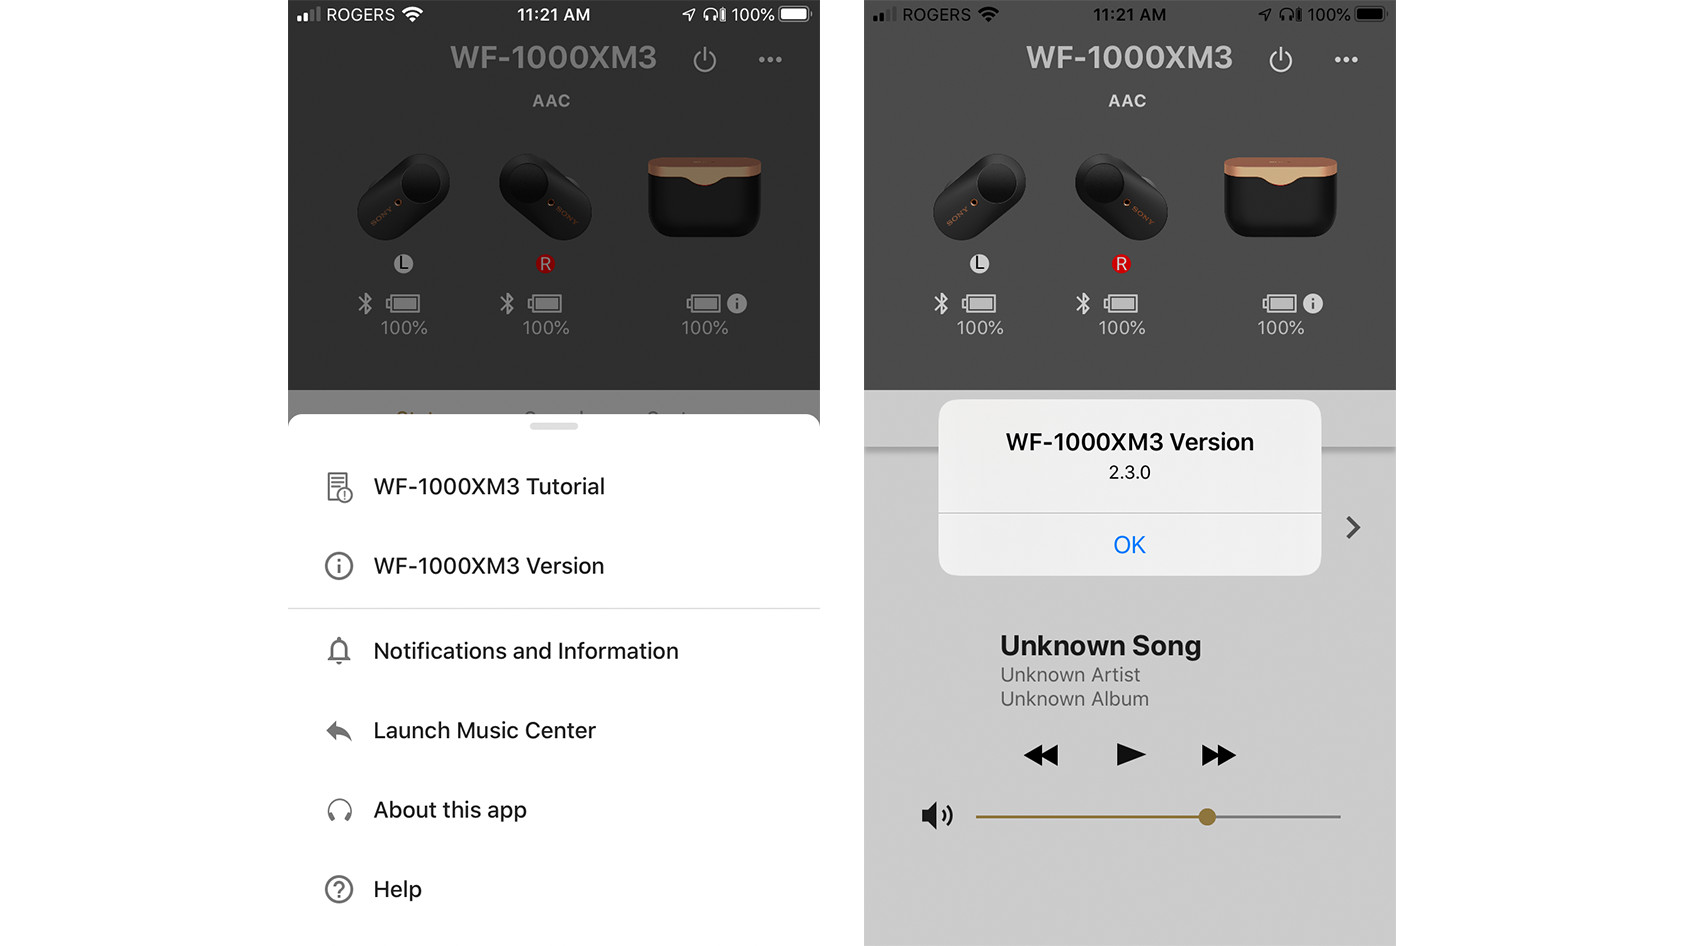
To check what firmware version your earbuds are running, you’ll need to download the Sony Headphones Connect app, which is available from the Apple App Store and Google Play Store at no cost. Once you’ve connected your earbuds, open the app and perform the following:
- Open the menu by pressing the three-dot icon on the top-right corner.
- Select “WF-1000XM3 Version.”
- A pop-up should appear with the firmware version currently installed.
How to update the firmware of your Sony WF-1000XM3
Firmware updates are important as it allows manufacturers to fix bugs and introduce enhancements to existing products. By default, the Sony WF-1000XM3 comes with the automatic updates feature enabled. However, updates can be performed manually instead.
Before updating the firmware, make sure to disable the Automatic Power Off feature, which could interfere with the update process. To do this, go into the System tab and under Automatic Power Off section; then, select the “Do not turn off” option.
If an update is available, a prompt will appear at the bottom of the screen within the app. Press the “More Info” button and then follow the on-screen instructions. A few things to note when updating the firmware of the WF-1000XM3:
- Updates can take up to 30 minutes, depending on your Internet connection and the size of the update.
- Ensure both earbuds are connected to your mobile device.
- Make sure each earbud is at least 50% charged.
- Do not place the earbuds into the charging case during the update.
The app will prompt you upon completion of the update. Press OK. After a few seconds, your earbuds will restart and should automatically reconnect to your device.
How to check the battery status
If you’re curious as to how much juice is left in your earbuds, you can check your battery percentage within the Sony Headphones Connect App. At the top of the screen you’ll see a breakdown of how much battery is left in each earbud, and in the charging case. The earbuds must be connected to the device in order to view these readouts.
How to reset your Sony WF-1000XM3 to factory settings

When it comes to solving connectivity problems or any other device issues, a manual reset to factory settings tends to fix everything. To do this, follow these steps:
- Place each bud into the charging case. Keep the lid open.
- Press and hold on the touch sensor on the left earbud until a red light illuminates (around 20 seconds).
- Repeat the previous step with the right earbud.
- Once both earbuds have been reset, use your mobile device to pair with the earbuds.
- Once paired, install the latest firmware before use.
Finally, if the factory reset doesn’t do the trick, you can initialize the WF-1000XM3 after a factory reset. You’ll need to set up all your settings as if the buds are brand new again.
- Place the buds in the case with the lid open, and ensure the indicator lights on the buds are both red.
- Place your fingers on both earbud touch sensors for 10 seconds, and take your fingers off when the lights blink.
- You’ll see four blue indicator lights blink to signal that the buds have initialized.
How to fix auto-pause functionality
The auto pause feature is handy when you need to quickly snap back into reality, but don’t want to miss a measure of your song. Any time you encounter issues with auto-pause, take any or all of these troubleshooting steps to try and solve the issue.
If auto pause isn’t working, make sure that the feature is enabled. In the Sony Headphones Connect app, under the System tab, make sure the “Pauses when headphones are taken off” option is enabled. If your content randomly pauses while you’re wearing your earbuds, try cycling the auto pause feature on and off.
Auto pause issues can be avoided by making sure your earbuds are up-to-date with the latest firmware. If all else fails, consider resetting your Sony WF-1000XM3 to factory default settings.
How to fix connectivity issues
If you’re experiencing random audio cutouts, there are a few troubleshooting steps you can follow. For starters, go into the app and under the Sound tab, scroll down to “Sound quality mode.” Make sure that it’s set to “priority on stable connection.”
This option is selected by default and is highly recommended by Sony, especially if you’re listening in an environment with a lot of wireless devices in use. It would also be a good idea to make sure your earbuds’ firmware is updated, especially since firmware updates often deal with connectivity issues.
How to customize the touch controls of the Sony WF-1000XM3
By default, the touch sensors on the Sony WF-1000XM3 come pre-configured with ambient sound controls on the left, and playback controls on the right. With the Sony Headphones Connect app, however, you have the option to customize the touch sensors to trigger whatever functions you desire.
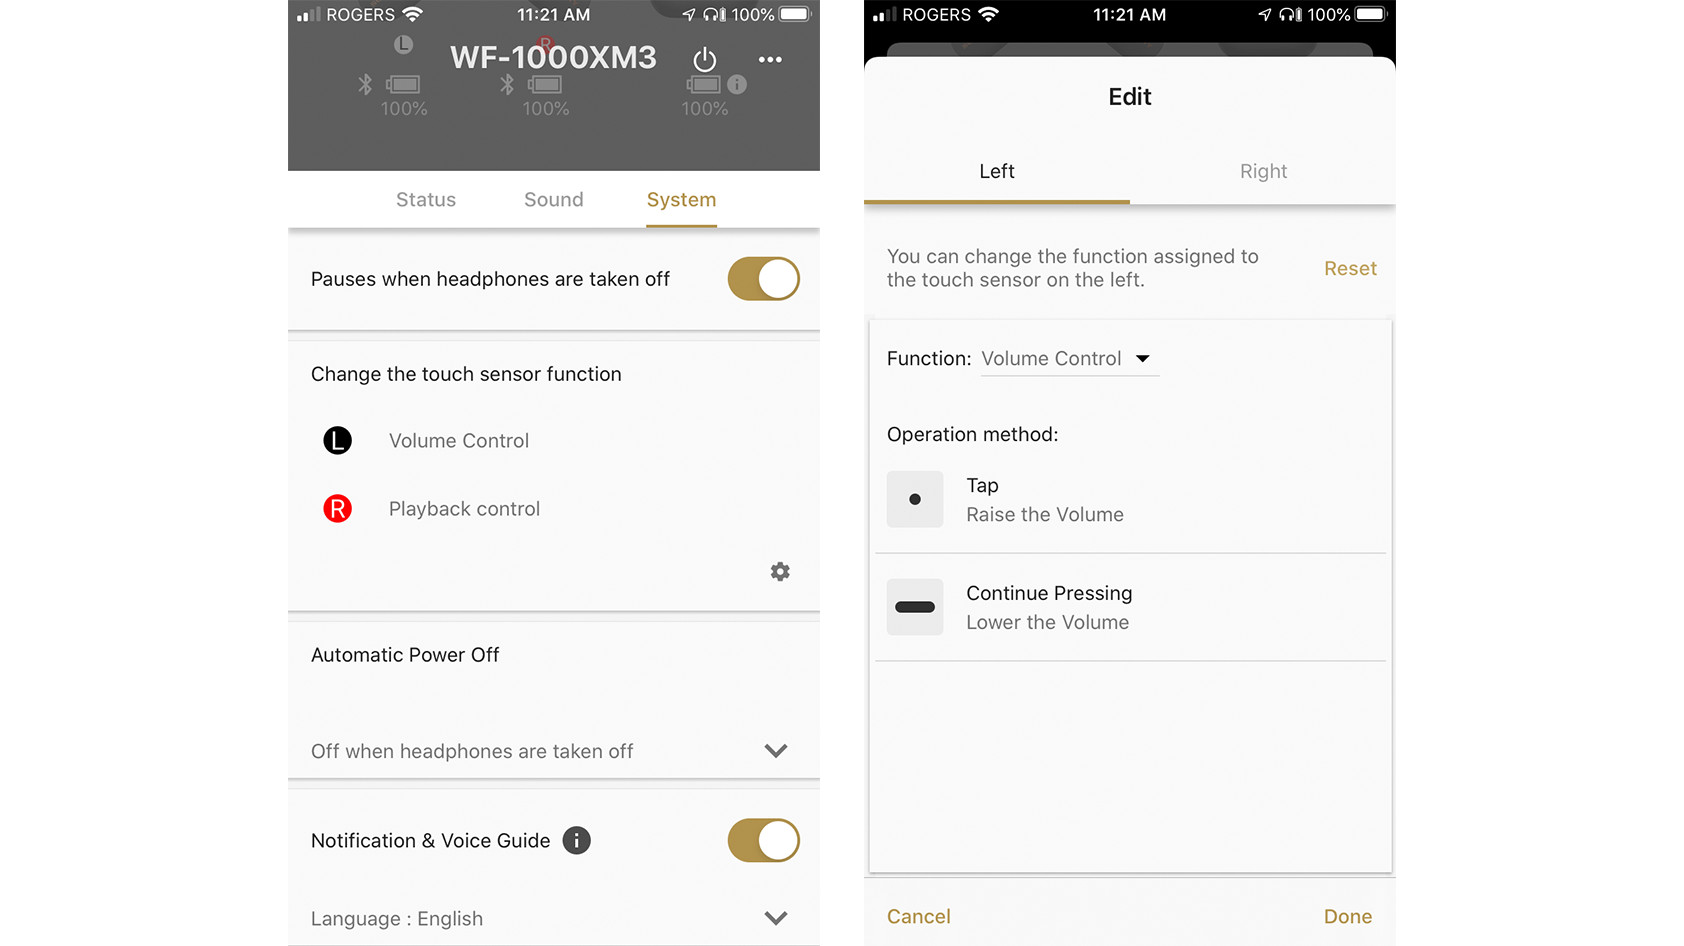
In the System tab of the app, under “Change the touch sensor function,” select the gear icon. From, there you can modify the function of each earbud.
Do note, however, that Sony divides touch sensor functionality into groups. This means that you can’t mix-and-match control functions in one ear—such as double-tap for volume up and long press for ambient sound control.
How to customize your sound with EQ
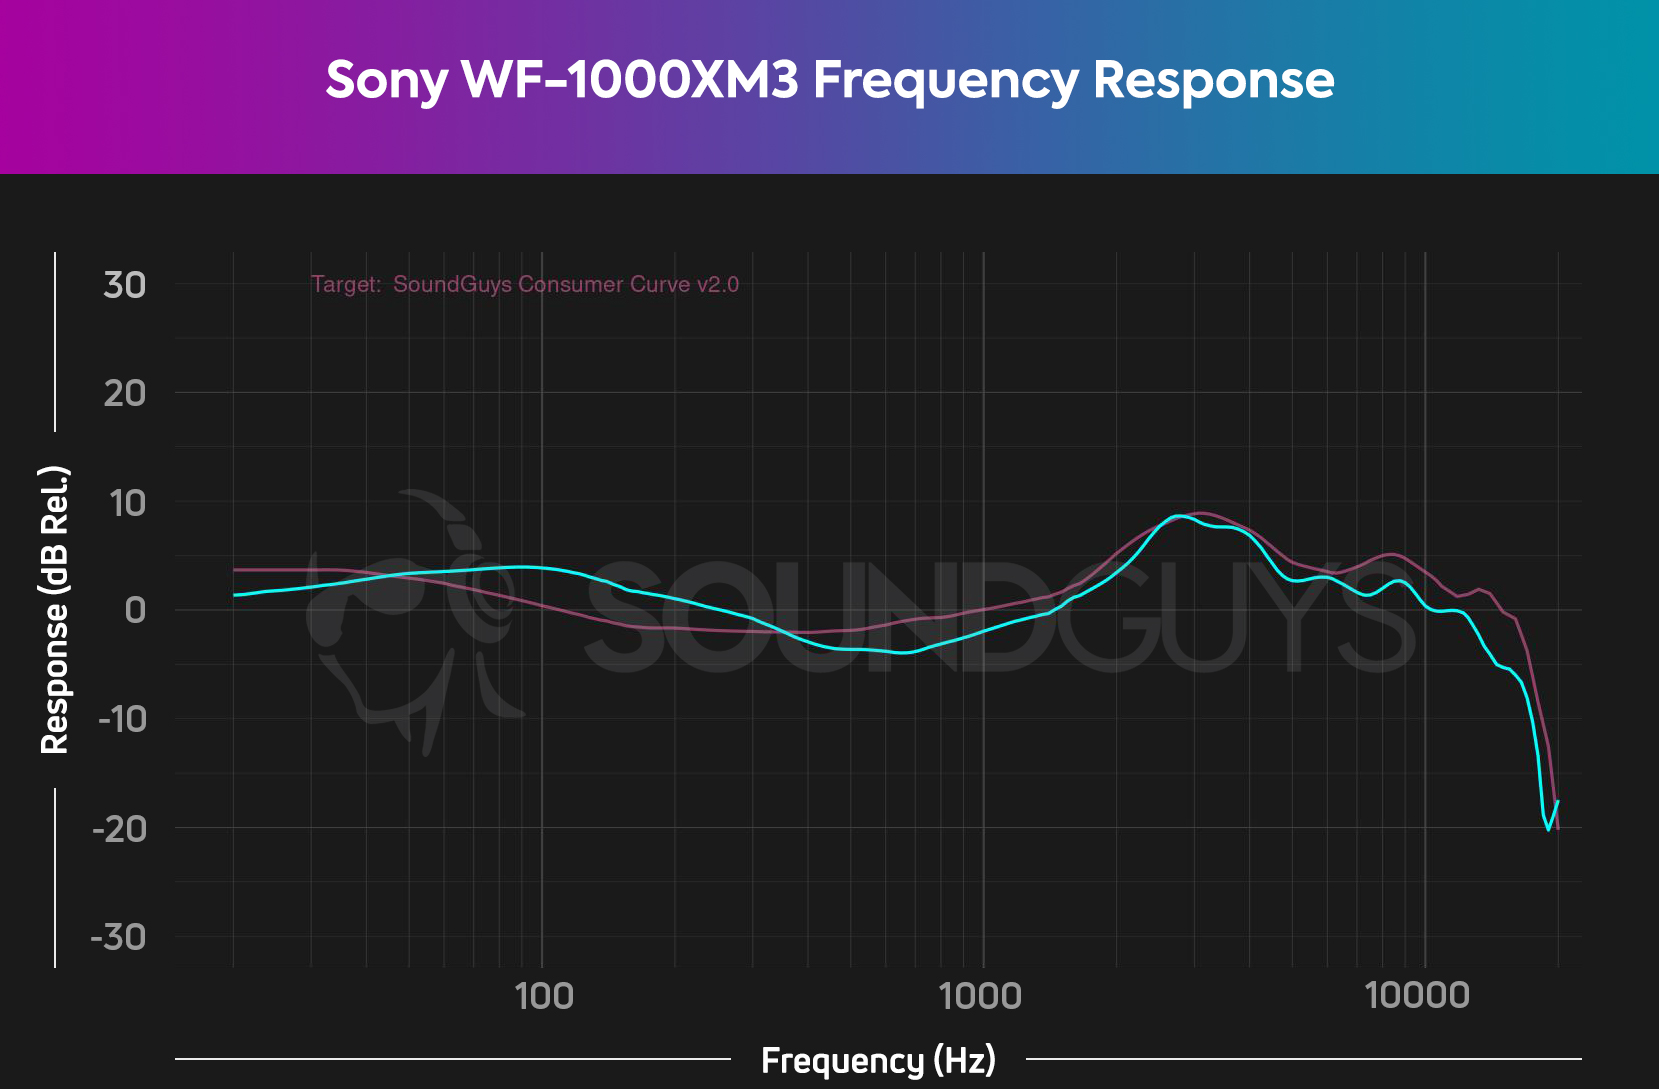
The default Sony WF-1000XM3 sound signature is tuned to satisfy most consumers, sporting a frequency response that emphasizes bass without sacrificing too much clarity in the mid-high frequencies. If, however, you’d prefer a little more oomph in your kick, or want to avoid treble frequencies from sounding too harsh, Sony has included EQ controls with the WF-1000XM3, which can be accessed using the Sony Connect Headphones app.
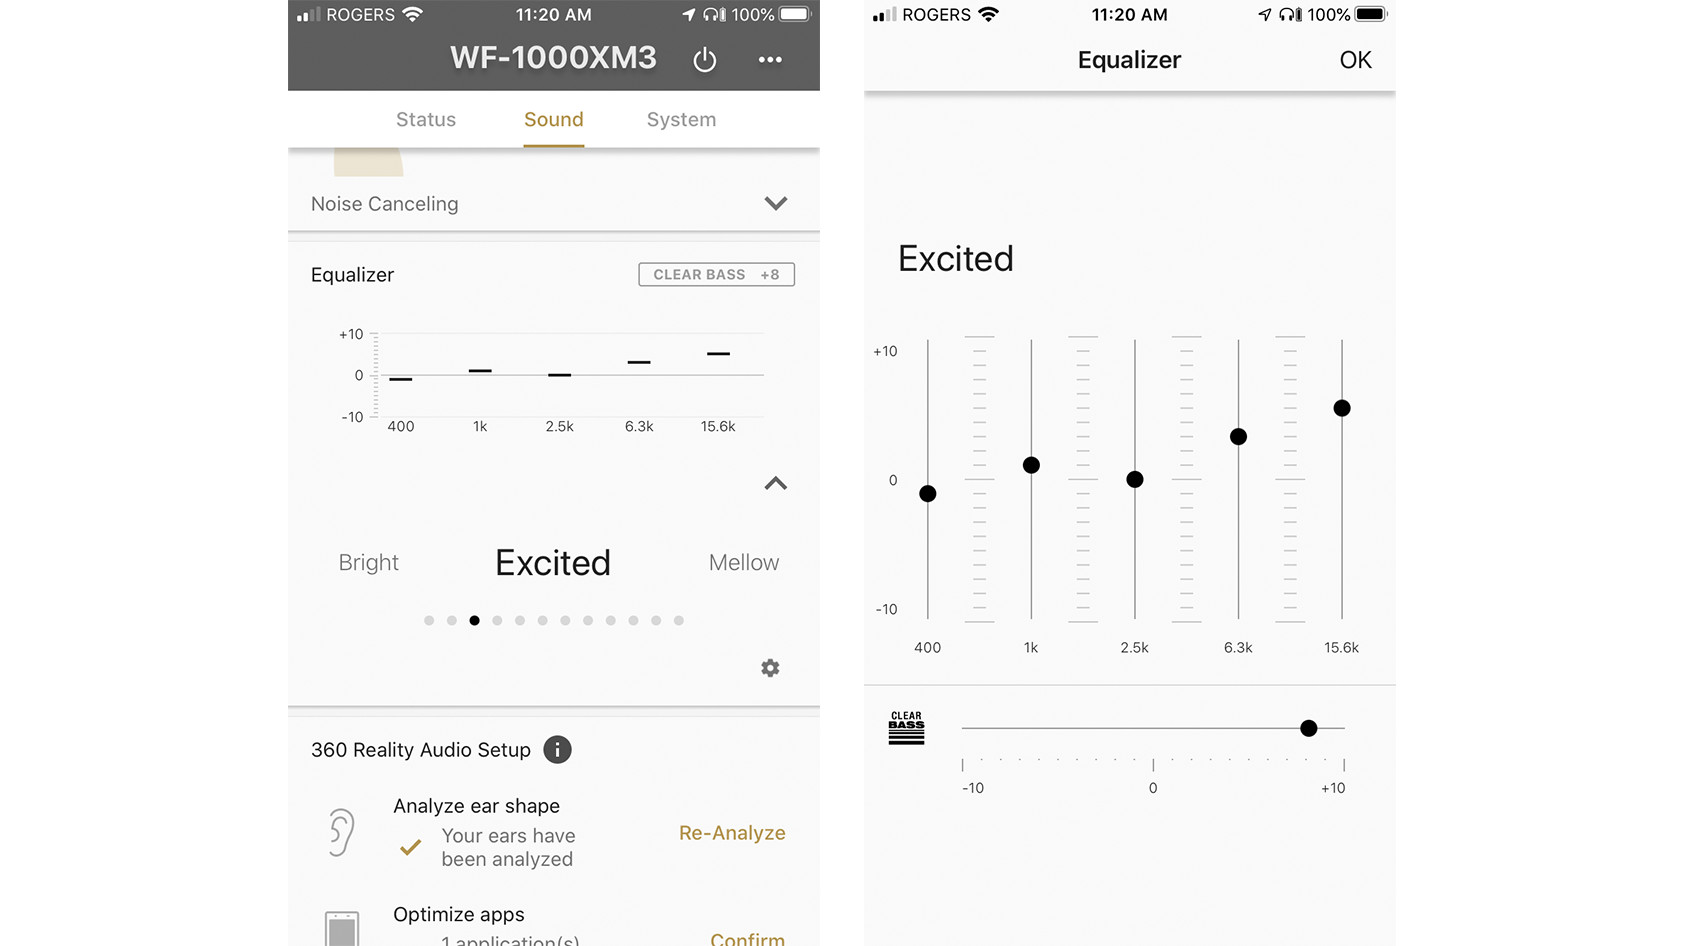
Inside the app, go into the Sound tab and you should see the Equalizer section. By default, the feature is switched off. To enable it, open the drop down menu by clicking on the little arrow in the lower right corner. From there, you can swipe through the presets that come with the app, or create your own.
To edit any of the presets, including the two custom preset slots, press the gear icon on the lower right corner of the Equalizer section. You should be presented with an editable 5-band EQ interface, with an additional Clear Bass slider: Sony’s attempt at reproducing dynamic deep-bass sounds without distortion. When you’re done, press OK and your edits will automatically be saved.
Why don’t I hear any difference listening to music with DSEE HX enabled?
One of the selling points of the WF-1000XM3 is its inclusion of Sony’s Digital Sound Enhancement Engine (DSEE HX), which is essentially the company’s way of improving playback of lossy files through audio upsampling. In other words, the feature is designed to make compressed audio sound better to the average listener by filling in the lossy compression.
To enable DSEE HX, go into the Sony Headphones Connect app. Under the Sound tab, scroll down until you find DSEE HX. Pressing on the switch will set the feature to Auto mode. You’ll see a DSEE HX label at the top of the app, underneath the model number of your earbuds.
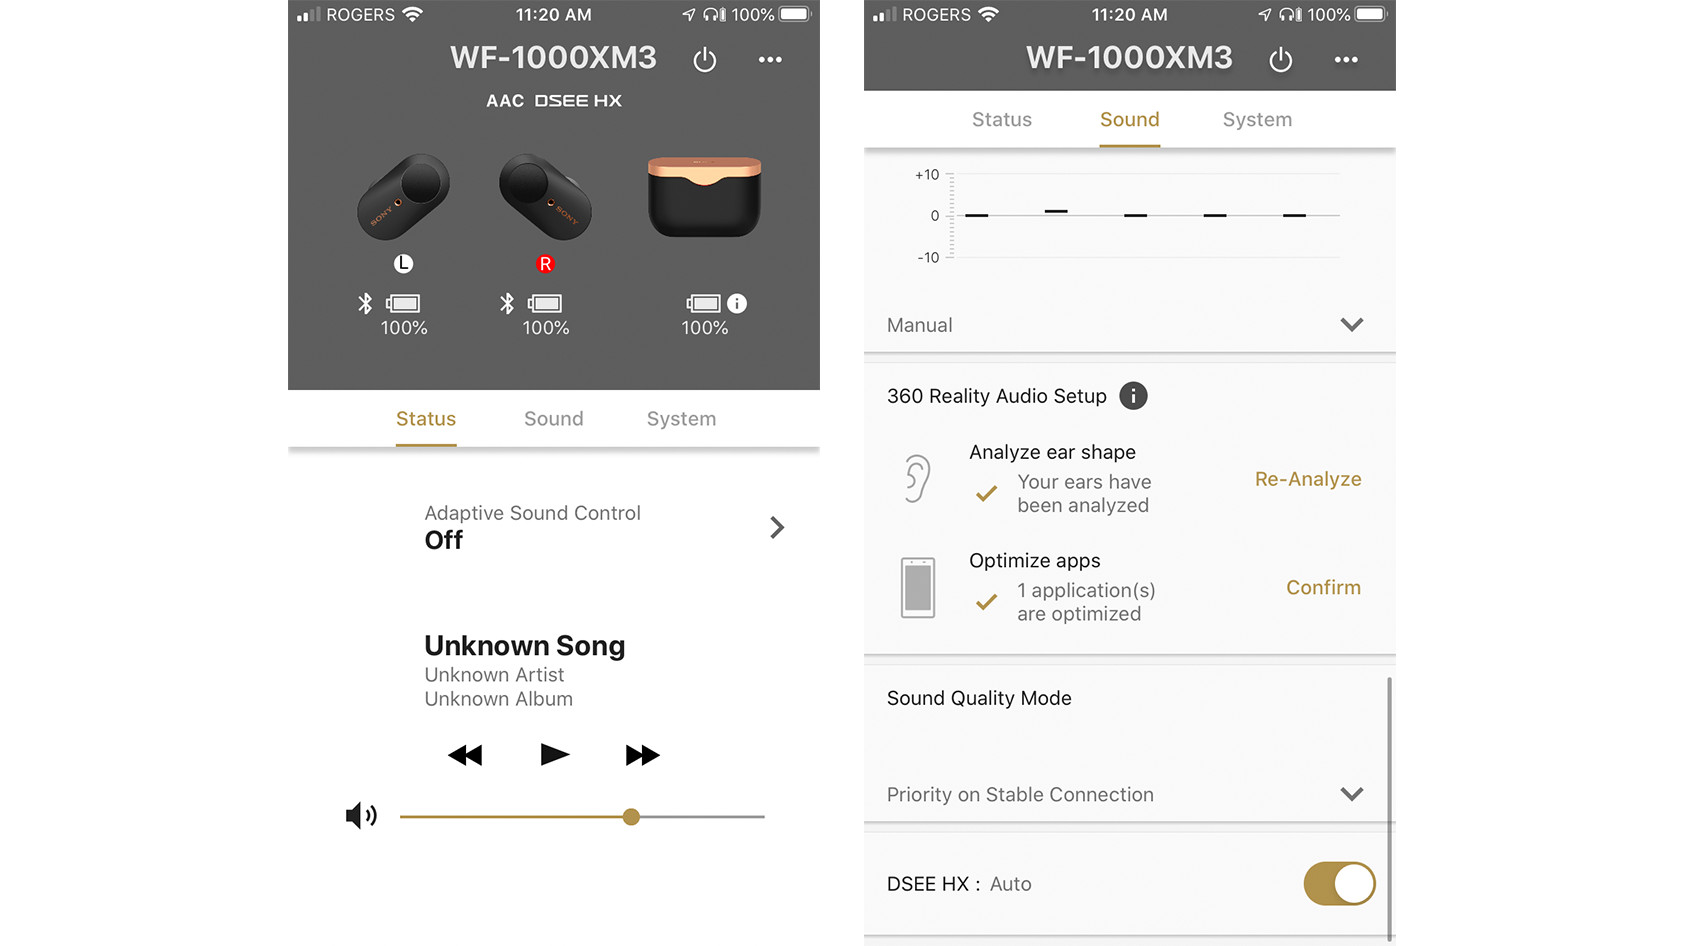
If you don’t see the DSEE HX label at the top of your screen, ensure that your earbuds are running the latest firmware. Sony released a software update in late September 2020 (version 3.0.0.) that allows the DSEE HX and EQ to function simultaneously, which was not possible in versions prior.
If the feature is on but you still don’t hear a difference, well, it’s not your fault. Although Sony’s marketing team tries to tout the feature as revolutionary, the average consumer won’t really hear any difference—especially since most people listen to their music via streaming services, which already means you probably aren’t getting the best audio quality. Still, if you’re curious, it wouldn’t hurt to give the feature a go if you’ve got some free time.
How do you set up the Google Assistant on the Sony WF-1000XM3?
To use the Google Assistant with your WF-1000XM3, you’ll first need to download the Google Assistant app. Once you’ve installed the app and logged in with your Google account, open the Sony Headphones Connect app and perform the following:
- Go into the System tab.
- Select the gear icon under “Change the touch sensor function”.
- Select which earbud you want to remap.
- Next to “Function”, select “Google Assistant” from the dropdown menu.
- Underneath the menu, you’ll see a message instructing you to complete setup in the Google Assistant app. Tap on the message.
- You will then be taken to the Google Assistant app. Follow the setup prompts.
- Once completed, return to the Sony Headphones Connect app and then tap “Done.”
How do you set up Amazon Alexa?
To use Amazon Alexa with your WF-1000XM3, you’ll first need to download the Amazon Alexa app. Once installed, open the Sony Headphones Connect app and perform the following:
- Go into the System tab.
- Select the gear icon under “Change the touch sensor function”.
- Select which earbud you want to remap.
- Next to “Function”, select “Amazon Alexa” from the dropdown menu.
- Underneath the menu, you’ll see a message instructing you to complete setup in the Amazon Alexa app. Tap on the message.
You will then be taken to the Amazon Alexa app. From there, you’ll need to add your WF-1000XM3 to your account.
- Tap the menu at the top left corner of the app, then select “Add Device.”
- In the “What type of device are you setting up?” screen, select “Headphones.”
- From the Available Devices screen, select “WF-1000XM3” or “LF_WF-1000XM3.”
- When you’re prompted with the message, “Set up Alexa on your WF-1000XM3” tap the Continue button.
- You will then be warned that Alexa will override the current voice assistant on your WF-1000XM3. Tap the Continue button.
To complete this process, return to the Sony Headphones Connect app and select Done in the touch controls remapping page.
How do you use Adaptive Sound Control?
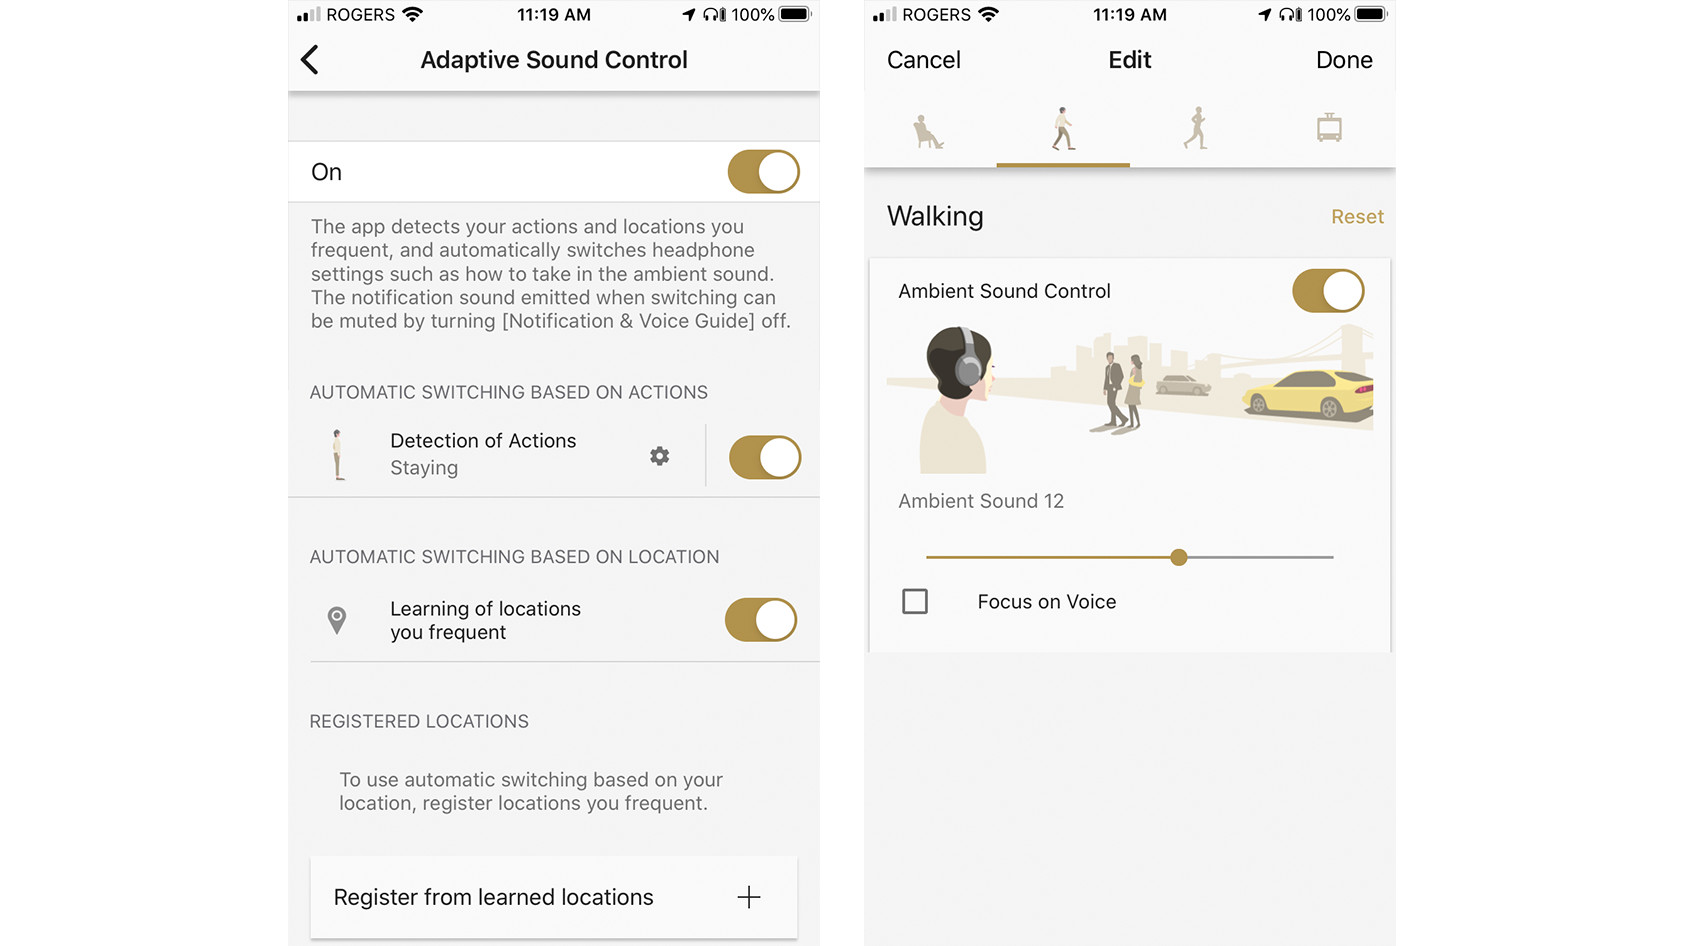
According to our tests, the Sony WF-1000XM3 has the best active noise canceling of any true wireless earbud—even better than the AirPods Pro. Not only does the WF-1000XM3 feature great noise attenuation, but it also features a system that automatically adjusts the level of noise cancellation based on your location. This is what Sony calls Adaptive Sound Control. If you want to set this up, connect to the earbuds and perform the following:
- Open the Sony Headphones Connect App.
- Go into the Status tab.
- Press the arrow next to “Adaptive Sound Control.”
- At the top of the screen, enable the feature.
- Under “Automatic Switching Based On Actions,” enable the “Detection of Actions” feature.
To edit your settings, press the gear icon next to “Detection of Actions.” From there, you have the option to dial in the amount of ambient noise you want (or don’t want), depending on your actions—when you’re sitting, walking, running, or even commuting.
You also have the option to automatically switch between noise canceling modes and EQ presets based on your location, using your phone’s GPS. In the Adaptive Sound Control menu, scroll down and enable “Learning of locations you frequent.” You can also manually input locations and device settings by scrolling to the very bottom of the page, under the “Registered Locations” tab.
Why do you only hear sound coming from one earbud?
It’s possible that one of your earbuds may not have successfully connected to your device. The easiest troubleshooting step is to simply place the non-working earbud back in the charging case. After 30 seconds, take the earbud out of the case. It should automatically turn on and reconnect with your device, indicated by a voice prompt. If that doesn’t work, try disconnecting and reconnecting your earbuds from your device’s Bluetooth settings.
If all else fails, you may need to perform a factory reset on your buds—which we described how to do at the top of this article. That should do the trick!
Why aren’t the Sony WF-1000XM3 earbuds charging?
For starters, place your earbuds into your charging case and close the lid. Wait for a red light to illuminate from the lip of the charging case lid, which can take up to 30 seconds.
If that doesn’t work, try cleaning the metal charging contacts on the earbuds and charging case using a dry soft cloth, such as the one you’d use to clean a pair of glasses. Debris or other foreign objects may have gotten stuck between the contacts, which would interfere with the charging process. Once cleaned, place the earbuds back in the charging case and wait for the red light to illuminate.
If the charging case isn’t charging, there could be something wrong with your USB-C cable. Sony recommends using the charging cable included with the WF-1000XM3. We like trial and error here, though., so try using another USB-C cable. Alternatively, charge the case using other power adapters or USB ports to rule out power source issues.
Your last at-home solution is to perform a factory reset. If all else fails, contact Sony for additional support and repair options, since it doesn’t sell replacement parts to general consumers.
Why do the earbuds keep falling out?
If your earbuds are constantly popping out of your ears, it’s probably because you didn’t get a proper fit, which is important for both sound isolation and comfort. The easiest fix for this is to replace the ear tips with ones that work best for your ears.
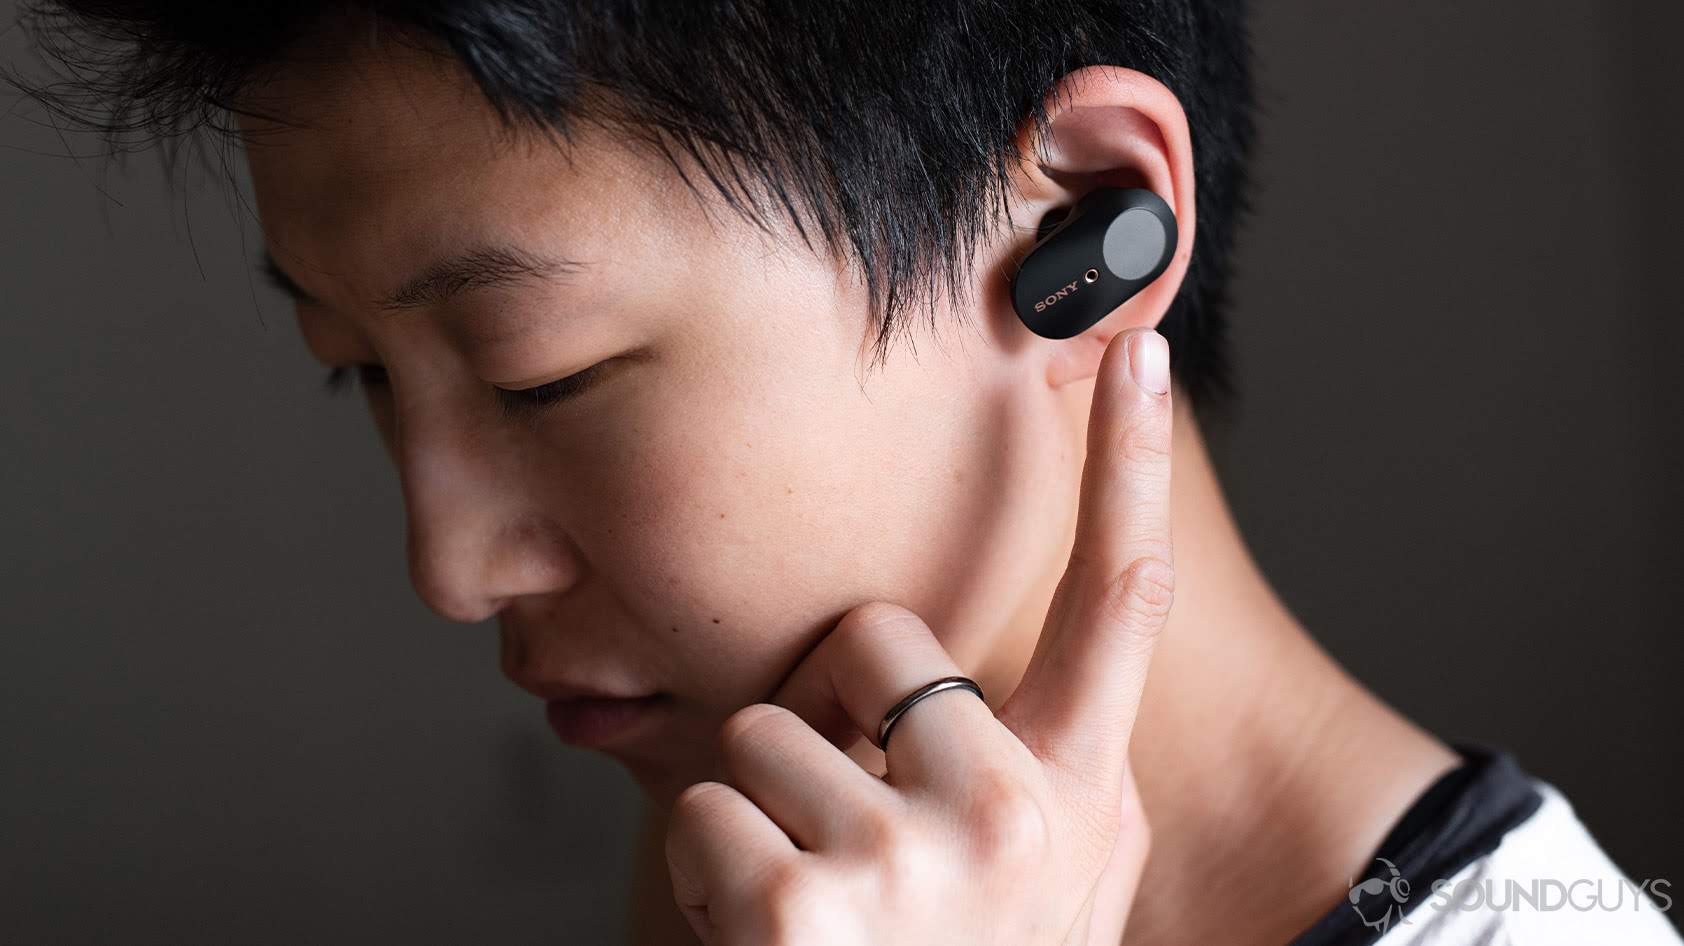
The Sony WF-1000XM3 comes bundled with a selection of ear tips made of either silicone or foam, with several sizes to choose from. By default, the earbuds are equipped with medium-sized silicone ear tips. If these don’t feel right for your ears, swap out the default ear tips with the other sizes and materials until you find ones that feel snug. It’s also common to find that you need differently-sized ear tips for each ear.
Some people have also found it useful to wear the WF-1000XM3 at a slight angle for an even more snug fit. To test how well your buds stay in your ear, try quickly shaking your head left and right. Just make sure to have your hands at the ready to catch the earbuds in case they pop out.
What if the noise canceling sounds bad on the Sony WF-1000XM3?
There are several reasons why noise canceling may seem ineffective. For starters, check if you are using the right-sized ear tips for your ear. After all, active noise canceling is only as good as passive isolation, which comes from a good fit.

Try swapping out different ear tips to see which materials and sizes work for you. To test for noise isolation, turn on a fan or play some white noise (pointing away from the earbuds) as you’re testing the fit to see which ear tip combination blocks out the most noise.
If the fit isn’t the problem, check your settings. In the Sony Headphones Connect app, under the Sound tab, make sure that Ambient Sound Control is enabled. Also, ensure that the feature is set to “Noise Cancelling,” and not “Wind Noise Reduction” or “Ambient Sound.” While you’re in the app, check if your earbuds are running the latest firmware. This could fix any potential issues you may have with noise canceling.
How do you set up Sony 360 Reality Audio?
If you want to truly immerse yourself in your content, try out Sony 360 Reality Audio: Sony’s approach to object-based spatial audio technology. In order to use this feature, you must complete the setup process in the Sony Headphones Connect app.
In the app, you’ll need to analyze your ear shape, which is performed using your front-facing camera. Follow the on-screen instructions which will guide you through the process. You’ll then need to download apps that support 360 Reality Audio.
Currently, the feature is only supported by a few premium music streaming services, such as Tidal (HiFi subscription), Deezer, and nugs.net. Once you’ve downloaded and subscribed to a compatible service, the last step is to go through the app optimization process, after which your earbuds will be primed and ready for 360 audio playback.
How to clean the Sony WF-1000XM3 earbuds
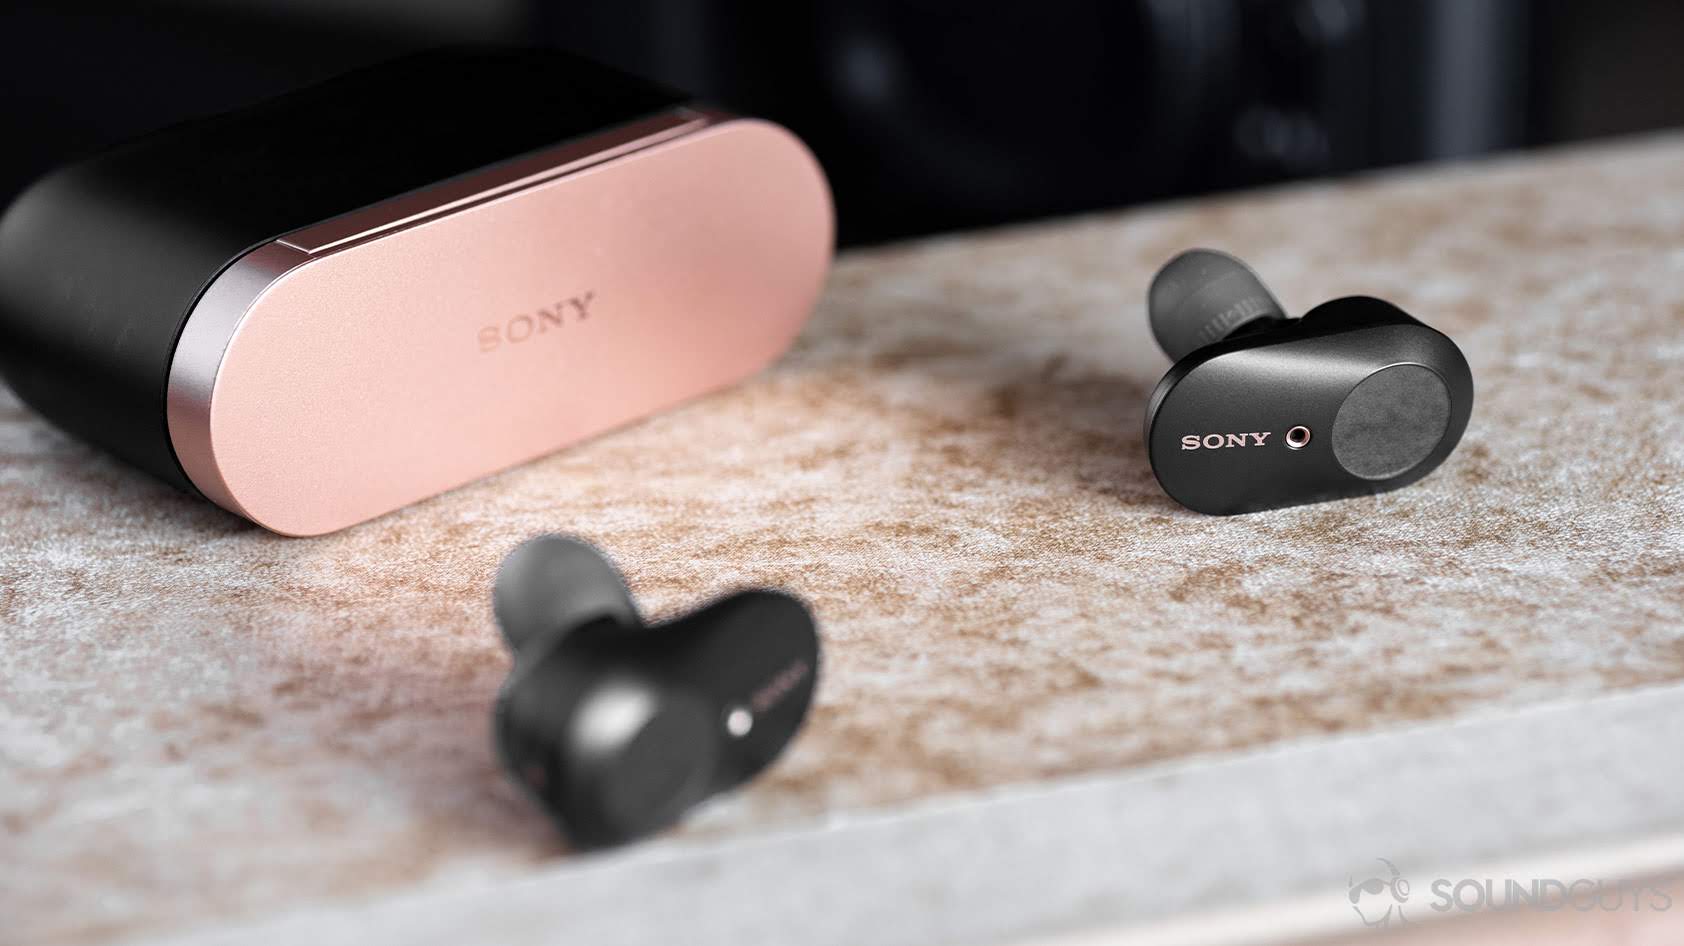
To clean the earbuds, use a soft dry cloth to wipe off any fingerprints, dirt or any debris that may have built up during use. When cleaning the metal contacts, be careful to avoid exerting any excess pressure on the pins.
If you want to clean the ear tips, simply remove the tips by carefully pulling on the tips until they detach from the earbuds. If there is a build-up of debris inside the ear tips, fold the ear tip inside out. You can then use some compressed air or a q-tip to dislodge any dirt or debris. After cleaning, reattach the ear tips to the earbuds.
How to clean the Sony WF-1000XM3 charging case
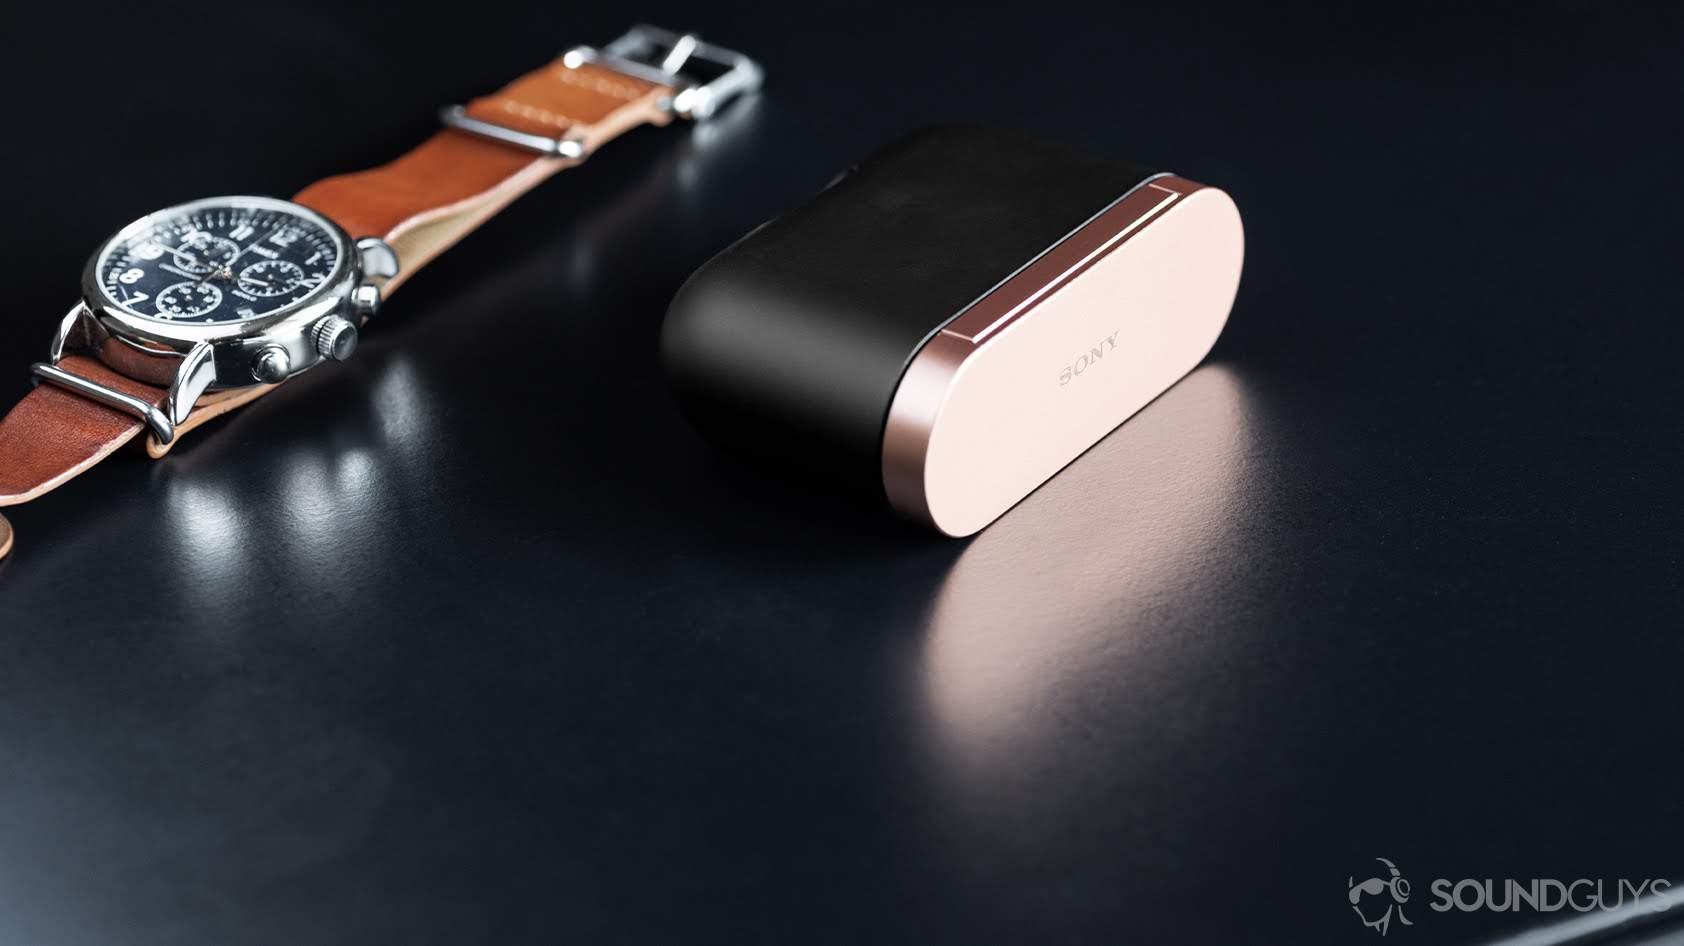
As with the earbuds, Sony recommends cleaning the charging case using a soft dry cloth. If the exterior of the case is particularly dirty, you can dip the cloth in a dilute solution of a neutral detergent, then wring the cloth well before wiping. Do not use any solvents such as thinner, benzene, or alcohol as they may damage the product’s surface.
To clean the interior of the case, use a soft dry cloth to carefully wipe the unit clean, being careful not to exert excess pressure on the charging contacts. Do not use a damp cloth when cleaning the interior as it may damage the case’s electronics.
Is something wrong with the battery?
As of now, true wireless earbuds don’t typically come with great battery life, especially when you compare them to wireless options (or “neckbuds”). Our objective battery life tests clocked the Sony WF-1000XM3 with a playback time of 4.76 hours. This might be fine for your day’s commute, but not for a 12-hour international flight.
In order to save battery life, you can try turning off features such as EQ or DSEE HX, which require additional processing power. You could also try turning down the volume or ANC (if the room is space enough), although this isn’t an ideal solution for most people who want to jam out to their tunes.
At the end of the day, batteries in any electronic device will degrade over time and the WF-1000XM3 is no exception. However, when you need to charge in a pinch, these earbuds are fast: 10 minutes in the charging case will give the earbuds enough power for 90 minutes of playback, while 90 minutes will fully charge the earbuds.
How to use the Sony WF-1000XM3
This is an easy one! Once you’ve completed the initial pairing process, all you’ll have to do is take the earbuds out of the charging case and put them on. The earbuds will automatically connect to the last device you used them with. Talk about simplicity at its finest! Of course, there are a lot more features under the hood, so be sure to check out our walkthrough of the Sony WF-1000XM3 for more information!
Frequently asked questions about How to fix problems with the Sony WF-1000XM3
First make sure your Sony WF-1000XM3 is disconnected from other devices. Yes you can be connected to more than one device at a time (up to two), but if you’re having difficulties, it’s just easier to make sure it’s disconnected. Next, go to your Settings in Windows and select Devices, and then Bluetooth. From there, select add Bluetooth device. Put your WF-1000XM3 into pairing mode, press and hold both buttons for seven seconds. You should see it appear in the list of available Bluetooth devices on your screen. Select it and it should be connected.
If you are having trouble finding your device in the available Bluetooth devices, try either exiting and re-opening the add Bluetooth device window as a refresh, or trying pairing mode again.
If you are unable to hear audio once connected, click on the speaker icon and make sure the output is set to the WF-1000XM3.
The last ditch resorts if you can’t seem to connect are giving the PC a restart, and checking that both the firmware on the earbuds is the current version and checking that your Windows PC has updated Bluetooth drivers. Check out more on Bluetooth set up here..
Using the case is the only way to charge the Sony WF-1000XM3.
Yes! You have the option to listen to music with just one earbud since both the left and right buds connect to your device independently. However, if you have already setup the Google Assistant with your WF-1000XM3, only the earbud configured with the assistant can be used during single-bud operation..
It’s difficult to know exactly why, but it could be because the right earbud is the master and the left is the slave bud, so the right one does more work. It’s pretty common for one earbud to drain a little faster than the other across all true wireless earbuds. If the disparity is significant, contact Sony because it could be a faulty battery.
When using the Sony WF-1000XM3 in windy environments, turn off active noise canceling or switch to Ambient Sound Control. Doing this prevents wind noise from sounding amplified. You can control the noise canceling function by tapping on the left touch sensor (if using default settings), or by accessing the controls using the Sony Headphones Connect app.
Both ear tip materials have their pros and cons. Silicone ear tips are easy to clean and don’t cost much to replace if you lose them. On the other hand, foam tips have the advantage of being able to create a better seal, thanks to the material’s reduced rigidity compared to silicon, thus providing better isolation. However, foam ear tips are more susceptible wear-and-tear from sweat or dirt buildup.
Thank you for being part of our community. Read our Comment Policy before posting.