All products featured are independently chosen by us. However, SoundGuys may receive a commission on orders placed through its retail links. See our ethics statement.
How to edit your voice
December 4, 2024
So you’re looking to podcast or become the next YouTube star—or maybe you’re just looking to record yourself for your own private use. You’ve got all your equipment, but your voice recording doesn’t seem quite right.
Here’s a quick, broad primer on editing your own voice recording for public consumption. This guide assumes that you have the proper equipment set up and the proper type of microphone for your purposes.
Editor’s note: this article was updated on December 4, 2024, to add information on editing voice recordings on Windows, iPhone, and Android, add a tips section, and an FAQ section.
A good recording environment is the best way to get good audio
It may sound obvious, but making sure your environment is noise (and echo) free is the best way to set up a good recording. Not only will you avoid having to edit out interstitial noise and sounds, but you’ll be able to avoid impossible-to-kill echoes and anything else you find yourself getting annoyed at.
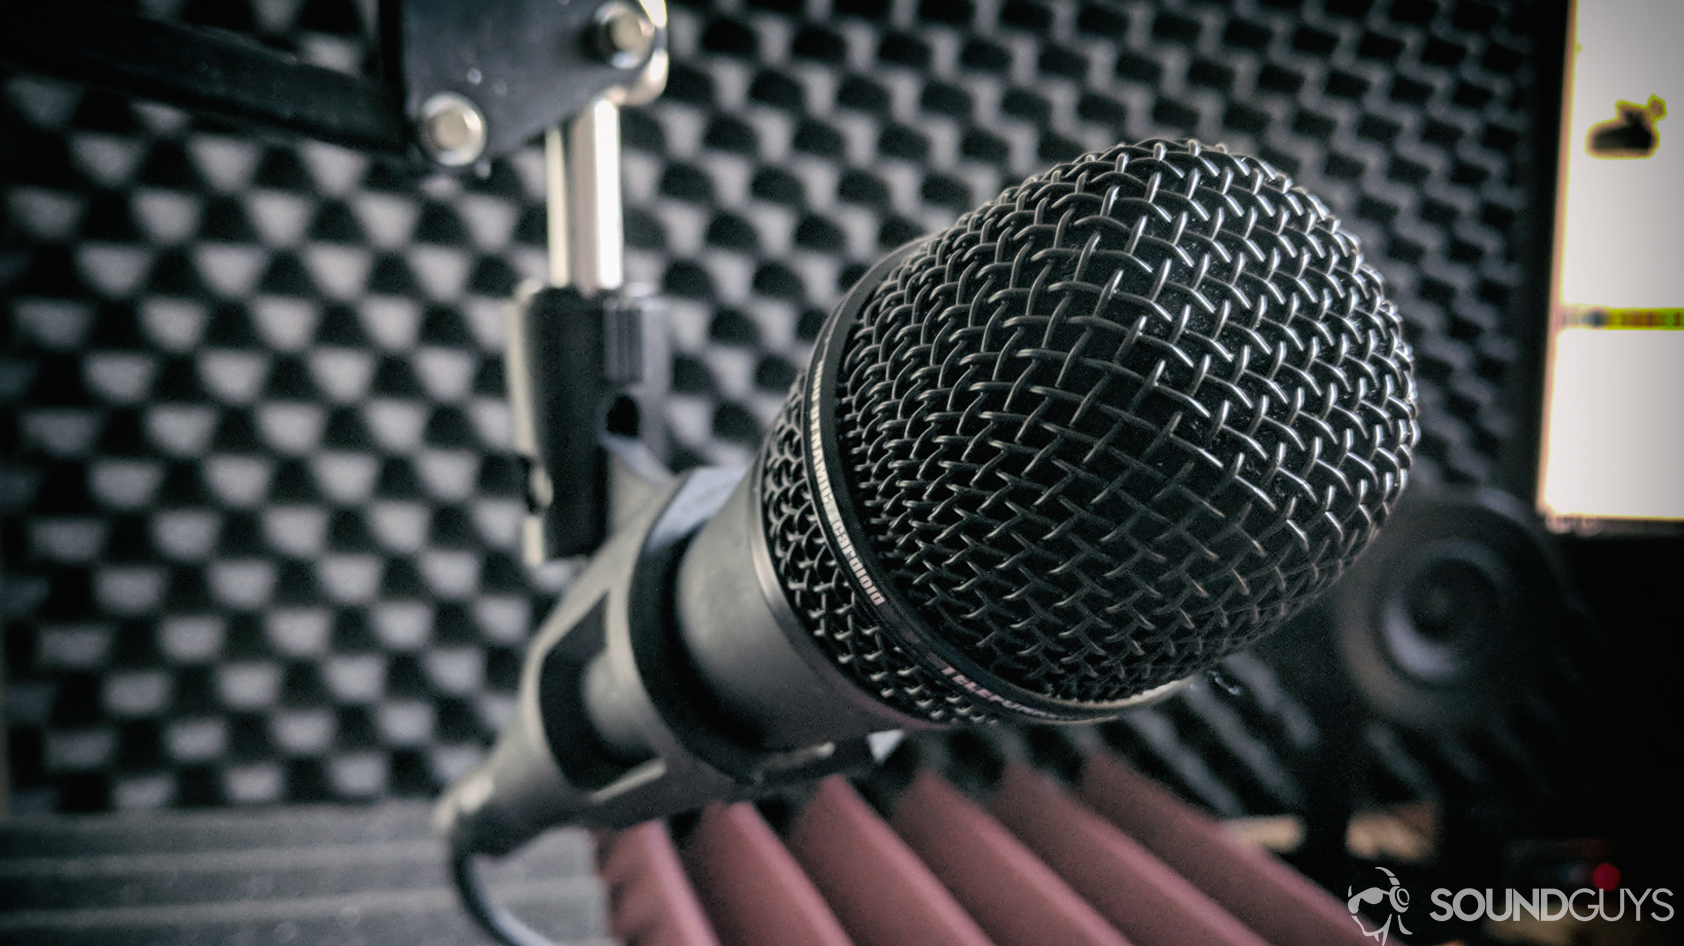
If you find your audio isn’t all that great, here’s what you should do in descending order of importance:
- Be sure you have a pop filter in place to prevent near-mic issues
- Ensure you have the correct equipment and the correct level of power in your equipment
- Treat the room for echoes, or get a mic shield
- Pick the right Digital Audio Workstation (DAW)
- Be sure you understand how to place your mic
It’s that last one that will be a little difficult, but we can help you get through it easily.
Pick the right DAW
A DAW is a program that will handle all your audio editing for you. There are plenty on the market now, but you will likely want to pay for one. I say this because the best DAWs are the ones that layer effects on top of sound rather than alter the original file.
Audacity is a great free tool if all you're doing is capturing a basic recording, but the effects it uses will change the original file.
For example, Audacity is a great free tool if all you’re doing is capturing a basic recording, but the effects it uses will change the original file. Adobe’s Audition on the other hand, will only layer effects on top of the original file, allowing you to change your recording’s effects to suit your needs later.
There are plenty of DAW applications out there for different uses, so test out some free trials and see which ones you like. Reaper, Pro Tools, and Audition will all set you back some cash, but what you get in return is outstanding. Free apps like Audacity have very limited uses but can help in a pinch. You may even get the software bundled with your equipment—for example, the Scarlett 2i2 comes bundled with Ableton Live! and Pro Tools.
Be sure to leave long periods of silence after starting a voice recording
While this may sound weird, you should always leave a bunch of dead air at the beginning and end of your audio. This way, you can improve your audio in several ways that you wouldn’t otherwise be able to do.
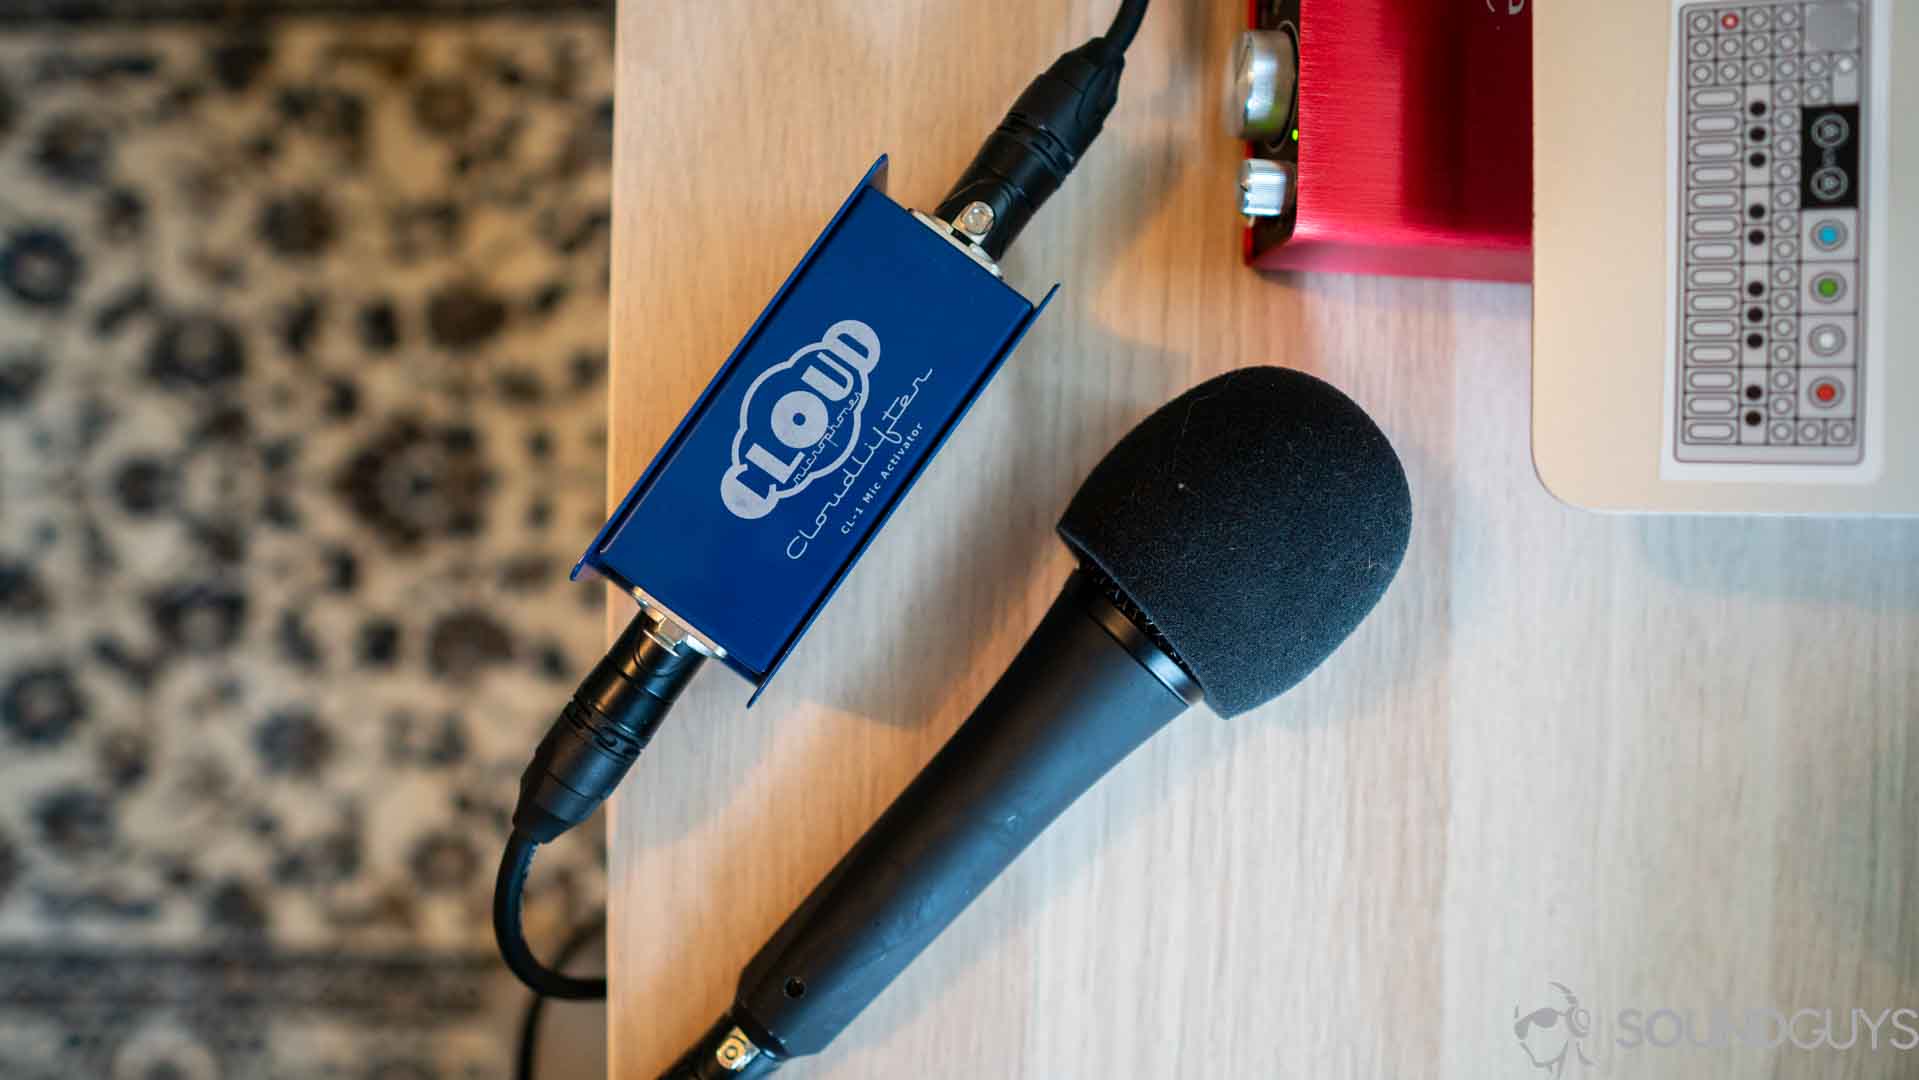
De-noise manually
Did you leave a lot of dead air time at the beginning of your recording? Good!
Leaving this dead air will also allow you to figure out important things, like how much noise you need to remove and how to set the limit on what gets removed from your voice recording. In general, you should never apply any more noise reduction than you need, and recording the dead air will allow your DAW to find that magic number quickly.
See where noise peaks on the voice recording are, and then turn down the level until there’s no more (or very little) noise.
De-noise intelligently
Many DAWs will have a de-noise option where you can select sections of nothing but noise to train the program to remove the right stuff. The cleaner the sample of noise is, the better it’s removed from the final recording. You should aim to have at least 5-10 seconds of noise to give the DAW, but that’s probably a little overkill. The DAW will then remove the noise based on the patterns you’ve given it, removing crackles and hisses from your file even when there are other sounds present.
Newer de-noising techniques that have recently come to prominence use machine learning and GPU hardware to perform de-noise processing. This includes technologies like NVIDIA RTX Voice and Krisp (which is already in use in Discord). While these aren’t available as VSTs for use in DAWs, the technology is gaining more prominence. There are also VSTs like iZotope’s RX 10 Voice De-noise, which is currently the industry standard for de-noising outside of built-in DAW techniques.
Use the compressor
Unlike your brain, your recording equipment will likely not know how to interpret wild swings in volume. Consequently, you’re going to want to use what’s called a “compressor” to help even these out. A compressor can be used to prevent clipping in samples, as well as bring up the levels of quieter sounds in your voice recording. This is accomplished by reducing the dynamic range of a track in a way that’s not going to damage the quality (much). As always, record with the highest bit depth you can. It’s also important that if you intend to use a compressor then you should also consider using a gate. This ensures that you’re not compressing and bringing up the noise floor of your recording in addition to your voice.
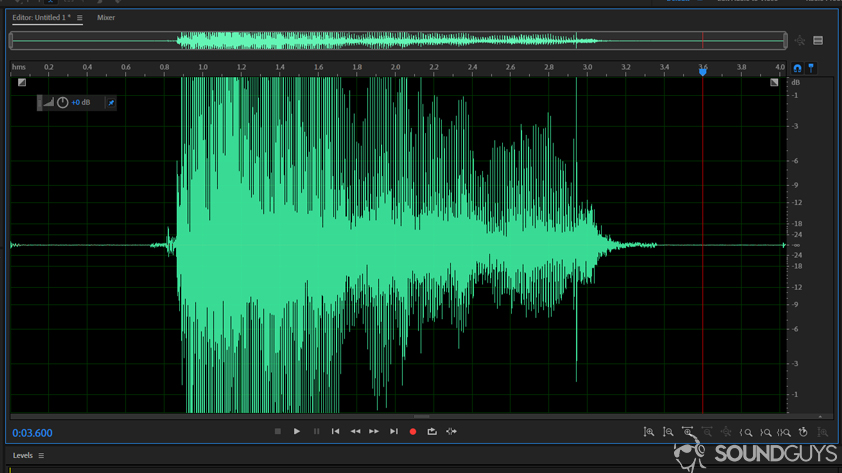
See those really high peaks in your recording? If they get too high, they will exceed the allotted values for loudness in your track. When that happens, the playback will get super loud and very noisy: it’ll sound like crap.
To avoid this, use the compressor (sometimes called the “speech volume leveler”) to bring the peaks of your voice below the clipping point and the quietest parts up to an audible level.
Threshold
The threshold is the point where you want the compressor to start bringing your peaks under control. Only sounds above that level will be compressed. You may want to play around with this a bit, but in general, I use -6dB, so I have more freedom to laugh on the mic. There’s no right or wrong answer here, but you’re going to have to listen to your voice over and over to see what makes sense for you.
Attack/release
This setting tells the DAW how fast to apply and how long it should take to stop the compressor effect. This can get a bit sticky, but ultimately, we’re talking about milliseconds here. Play around with this, but be aware that you may want to cut up your speech track a bit if you want to use different measures. A slow attack time will run the risk of clipping, but it gives instruments like the snare drum more punch. A fast attack time might seem jarring if you were expecting a louder signal, and so on. Usuall,y the system defaults will be fine.
Ratio
Compressing your audio does not mean it’s a hard limit. Instead, the compressor applies a reduction ratio to the signals in order to maintain some dynamics. The ratio you select will be applied to only signals above the threshold discussed earlier. The greater the ratio you select, the more aggressively the compressor will reduce the peak levels. The lower the ratio you select will affect your audio less. If you have very strong peaks, you’re going to want more aggressive ratios to normalize your levels. If you’re having trouble visualizing that, here’s a better representation of what I mean.
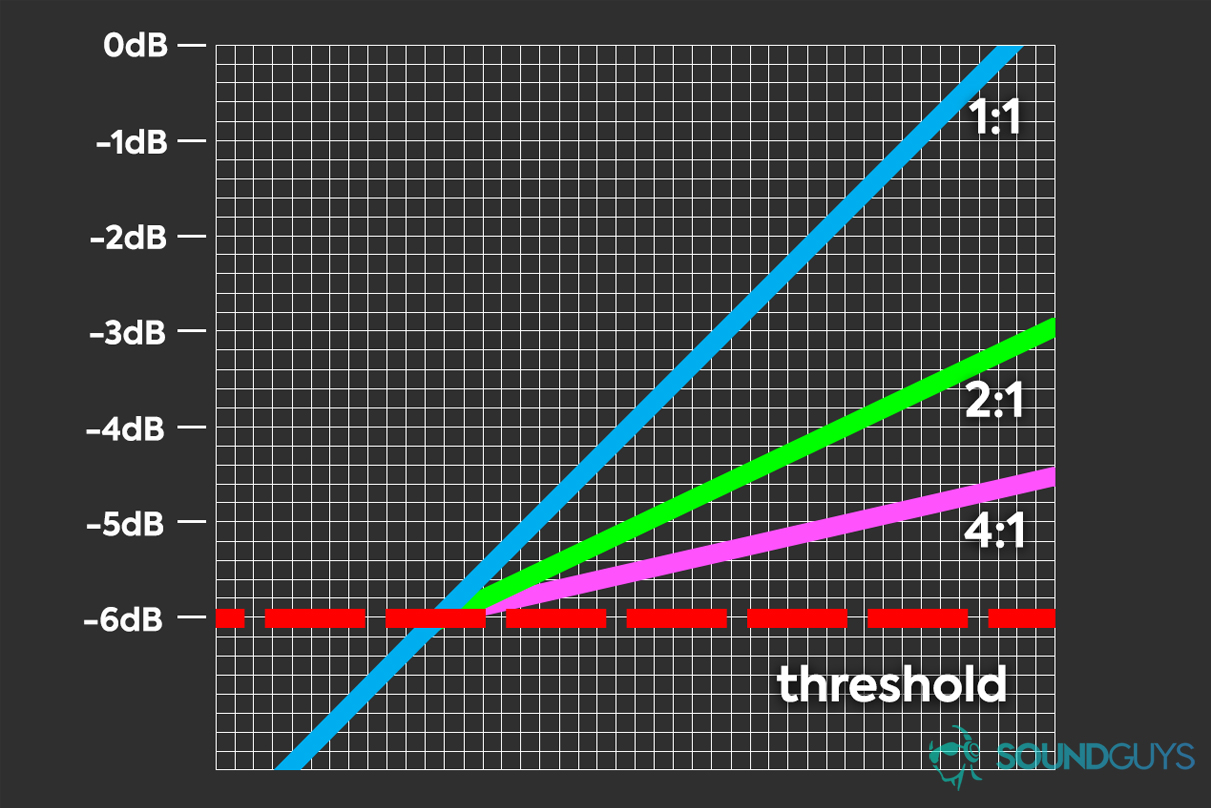
Hopefully, that clears it up.
Use the de-esser
If you’re like me, proximity to your microphone means very sibilant vocals. If you find your s, sh, f, and other high-frequency sounds are really grating in your voice recording, use the de-esser. This is a tool that will take a certain range of frequencies that make up these sounds and reduce their loudness. You can also achieve a similar result using an equalizer, but in that case, you’ll have to select the ranges manually.
High-pass filters are your friend
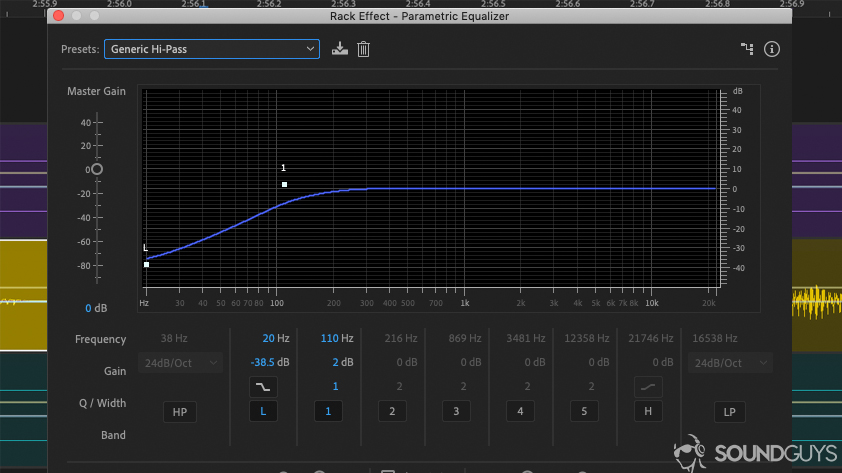
While it may seem counter-intuitive, bassier individuals will probably want to use what’s called a “high-pass” filter. This filter sets a certain frequency of sound to dampen or mute everything lower-pitched than the set threshold.
You may like the rich sounds of your voice, but listeners in a car or using bassy headphones will just tire of it really quickly. Use the high-pass filter to deaden everything under 50Hz, maybe a little higher.
Don’t just cut, crossfade
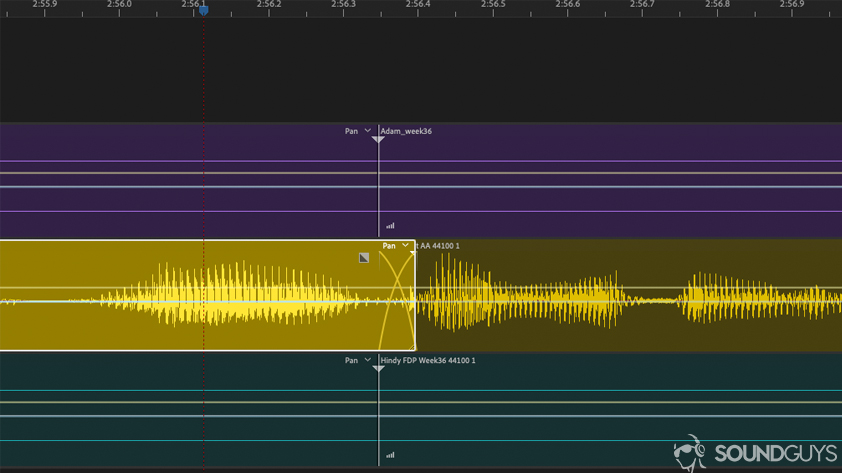
Instead of cutting up a track with the razor tool, consider using a cut and crossfade instead. This will reduce the power of the first segment and blend it seamlessly into the second, meaning no jarring transitions in your voice recording from one second to the next.
Use a light hand
Finally, keep a light hand when you’re applying edits. You’re going to want to make everything perfect right off the bat, but it’s very common to make your voice sound crappier than it did to begin with during your pursuit of perfection. Sometimes a little bit of noise is preferable to a distorted and compressed voice in your final product.
Going too crazy with the effects can really torpedo your mix, so just take a light hand, eh? You’ll thank yourself later, especially if you use a DAW that alters the original file.
How to tell when you’re done
You know you’re done editing your voice recording when it sounds good on its own. Turn it up loud, make it quiet, and play it over and over. If you still don’t know if it’s ready, it’s ready. Really, you’re just trying to make it sound as free of errors as possible.
It’ll be obvious if your voice recording isn’t ready for primetime. Luckily, you’re not recording an orchestra: just one voice.
Read next: How to write a song
How to edit voice recordings on Windows
Windows users have several excellent options for voice editing that don’t require a significant investment. Audacity stands out as the go-to free solution for many content creators. You can download it directly from audacity.org and start editing within minutes. While it does modify your original files directly, its straightforward interface makes it perfect for beginners.
The basic workflow in Audacity is straightforward. Start by importing your audio file, then use the noise reduction effect to clean up any background noise. The normalized effect helps balance your volume levels, while the compressor can even out the loud and quiet parts of your recording. When you’re done, you can export your file in either MP3 or WAV format.
For those seeking professional-grade editing capabilities, Adobe Audition offers a more robust solution. As part of the Creative Cloud subscription, Audition provides non-destructive editing, which means you can always revert changes. It comes with podcast templates for quick starts and includes superior noise reduction and restoration tools. The batch processing feature is particularly useful for handling multiple recordings.
Voice Mod has gained popularity among streamers and content creators. It offers both free and premium versions with real-time voice modification capabilities. The software shines in its ability to create custom voice effects, making it particularly useful for creative content.
How to edit voice recordings on iPhone and Android
Mobile editing has come a long way, with both iPhone and Android offering powerful solutions for voice editing on the go. For iPhone users, GarageBand remains the gold standard for free voice editing. Apple’s software includes built-in noise reduction, basic compression, and EQ controls. You can record multiple tracks and export directly to various formats, all from your phone.
Voice Record Pro offers another solid option for iOS users. The app provides professional-grade recording capabilities with basic editing features. You can trim and merge recordings and export them in multiple formats. The interface is intuitive enough for beginners while offering enough features to satisfy more demanding users.
Android users will find WaveEditor to be a comprehensive solution for voice editing. The free version includes the most essential features, while the premium version unlocks additional capabilities. The effects library is particularly impressive, and the multi-track support makes it suitable for more complex projects.
RecForge II has become a favorite among Android users who need professional recording capabilities. The app handles basic editing tasks well and includes background noise reduction. Its support for multiple formats means you can easily share your recordings across different platforms.
Tips for better voice recording quality
The room you choose for recording plays a crucial role in your final sound quality. Small rooms with soft furnishings tend to work best, as they naturally reduce echo. Adding blankets or foam panels to your recording space can dramatically improve the sound. Try to stay away from windows and noisy appliances that might introduce unwanted background noise.
Microphone positioning makes a significant difference in recording quality. To reduce plosive sounds naturally, position your mic slightly off-axis, about 15-30 degrees from your mouth. Maintain a consistent distance of 6-8 inches from the microphone throughout your recording. Using a mic stand helps eliminate handling noise that can ruin an otherwise perfect take.
Before you start recording, take the time to optimize your equipment settings. Set appropriate gain levels and always use a pop filter or windscreen. If you’re recording in an untreated room, consider using a reflection filter for better isolation. These small preparations can save hours of editing time later.
During your recording session, stay hydrated to prevent mouth clicks and maintain consistent volume levels. Always record a few seconds of room tone for noise reduction purposes. Using headphones to monitor your recording helps you catch problems immediately. Remember to take regular breaks to prevent vocal fatigue.
Frequently Asked Questions
Your recorded voice sounds different because you normally hear your voice through both air conduction and bone conduction. In recordings, you’re only hearing the air-conducted sound, which is what everyone else hears. While this can be jarring at first, you’ll get used to it with time. Focus on the technical quality of the recording rather than how different your voice sounds to yourself.
Echo usually means you’re recording in a room with too many hard, reflective surfaces. Try recording in a smaller room with more soft furnishings like curtains, carpets, and cushions. If you can’t change rooms, create a makeshift vocal booth by hanging blankets around your recording space, or record under a heavy blanket for a quick fix.
These popping sounds, called plosives, happen when bursts of air hit the microphone. The easiest fix is to use a pop filter positioned between your mouth and the microphone. If you don’t have one, try positioning your microphone slightly above your mouth angle, pointed downward, or speak slightly across the microphone rather than directly into it.
Prevention is always better than cure. Start by turning off air conditioners, fans, and other noisy devices before recording. If you still get background noise, most editing software includes noise reduction tools. Record a few seconds of room tone (background noise without speaking) at the start of your recording – this gives the software a clean sample of the noise to remove.
Both can work well – it depends more on your microphone than the device recording. A good USB microphone connected to your computer will typically give you better results than your phone’s built-in mic. However, modern phones with a quality external microphone can produce excellent recordings. The key is consistency in your setup and recording environment.
Thank you for being part of our community. Read our Comment Policy before posting.